Selasa, 27 Maret 2012

How to install windows 8 on Ipad

The new Operating System from Microsoft windows 8 is now the most imporant system on internet

all users looking just for it and waiting for the launch time.in accordance with this Metro User Interface Windows that is just best for all the tablet users and lovers. This Metro UI in Windows 8 was developed
for all tablets that have touchscreens that includes iPad of Apple too. And so the Metro UI of Windows 8
that is popular feature that may be easily installed in an Apple iPad too.


befor widows 8 released all users were looking to install MAC OS X in their windows XP or vista or windows 7..but now every thing have changed and Ipad usres start looking to have the nice Metro UI on Ipads.
So if you are one from Ipad users and want to test windows 8 just follow this tutorial. and enjoy your new system with a wonderful interface.

Steps to Install windows 8 Metro UI on Ipad :

1.First install the Windows 8 in your own PC or just virtual machine.
2.download the Splashtop Remote Desktop for the iPad app directly along Apple’s iTunes app store.
3. install now the Splashtop Streamer in Windows 8.
4.Set up Splashtop Streamer on your computer and set a your password.
5.Run Splashtop Remote Desktop on your iPad
6.select your OS Windows 8.
Continue reading →

How to install/uninstall Windows 8 Consumer Preview language packs


finaly Microsoft has released language packs for windows 8 consumer preview and this will let all users
change it to any language they are looking for. because Windows 8 Consumer Preview language packs are available for computers that are running under this OS . The Windows 8 Consumer Preview language packs
can be installed only from the language control panel in desktop. These language packs are not available
on the Microsoft Windows Server Update Services (WSUS) server or through the Microsoft Download Center.


How to install a Windows 8 Consumer Preview language pack
and change the Windows display language?


To download and install a Windows Consumer Preview language pack, follow these steps:
On the Start page, type language, and make sure that the search scope is set to Settings.


In the Results panel, click or tap on Language.

In the Change your language preferences pane, click or tap Add a language.
Browse or search for the language that you want to install. For example, select Catalan, and then tap or click Add.
Catalanis now added as one of your languages.
In the Change your language preferences pane, click or tap Options next to the language that you added

If a language pack is available for your language, click or tap Download and install language pack.
When the language pack is installed, the language is displayed as available to use as the Windows display language
To make this language your display language, move it to the top of your language list.

Log off and then log on to Windows for the change to take effect.
Notes
Installing many additional language packs affects disk space and system performance. In particular, disk space and system performance are affected during servicing operations, such as service pack installations. Therefore, we recommend that you only add a language pack to your computer if you will use the language pack.
Language packs also let multiple users who share a computer select distinct display languages. For example, one user can select to see the dialog boxes, menus, and other text in Japanese, whereas another user can select to see the same content in French.


How to uninstall a Windows 8 Consumer Preview language pack?


To uninstall a language pack, follow these steps:


On the Start page, type language, and make sure that the search scope is set to Settings.


In the Results panel, click or tap on Language.

In the Change your language preferences pane, click or tap Options next to the language that you want to change.


-Click or tap on Uninstall language pack.
-Follow the instructions to uninstall the language.

Prerequisites
To apply this update, you must be running Windows 8 Consumer Preview.
Registry information
To apply the update in this package, you do not have to make any changes to the registry.
Restart requirement
You may have to restart the computer after you apply this update.
Update replacement information
This update does not replace a previously released update.


****This update is available from the following Microsoft Update website*****Support.microsoft.com/kb/2607607
Continue reading →

Install Windows 8 Preview on Your Mac Using Boot Camp

These are instructions on how to install Windows 8 Consumer Preview on your Mac using Boot Camp.


Before you begin this tutorial you will need the Windows 8 Consumer Preview ISO and Product Key. Those of you with a DVD burner will need to burn this ISO to DVD before continuing. Those of you (like us) without a DVD drive will need to connect a blank 8GB USB flash drive before beginning.

Step One
Open a new Finder window by clicking the Finder icon in your dock.
Click here to enlarge

Step Two
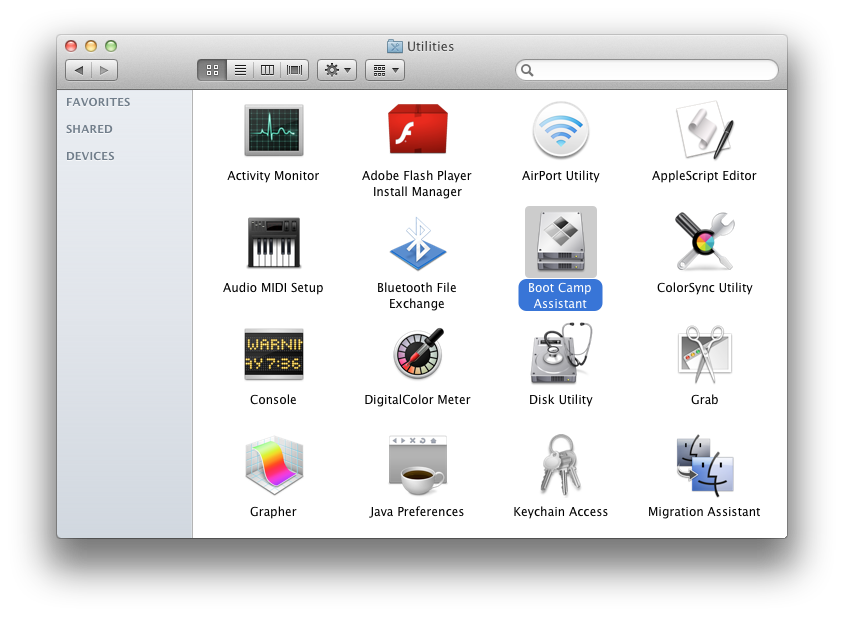
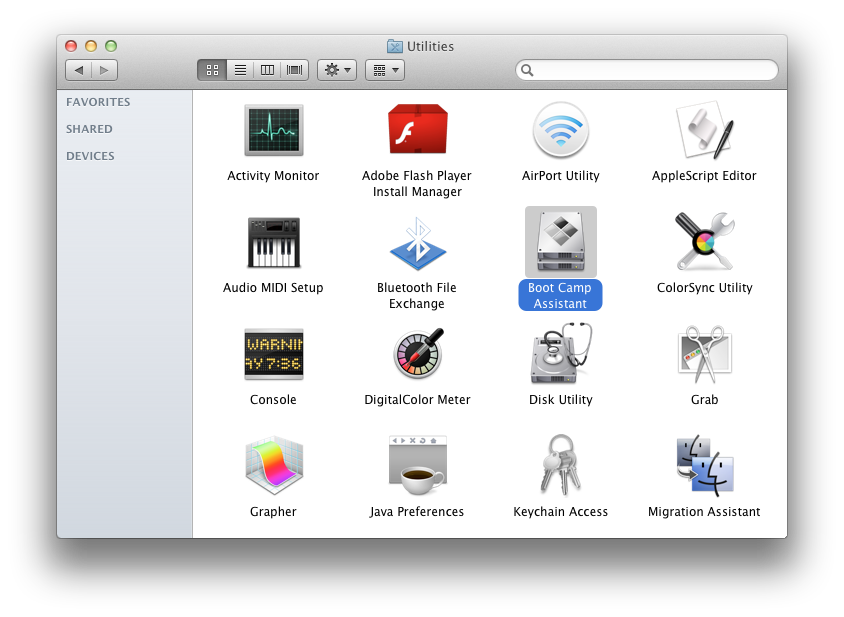
Navigate to the Applications : Utilities folder and double click the Boot Camp Assistant icon to launch the application.
Click here to enlarge

Step Three
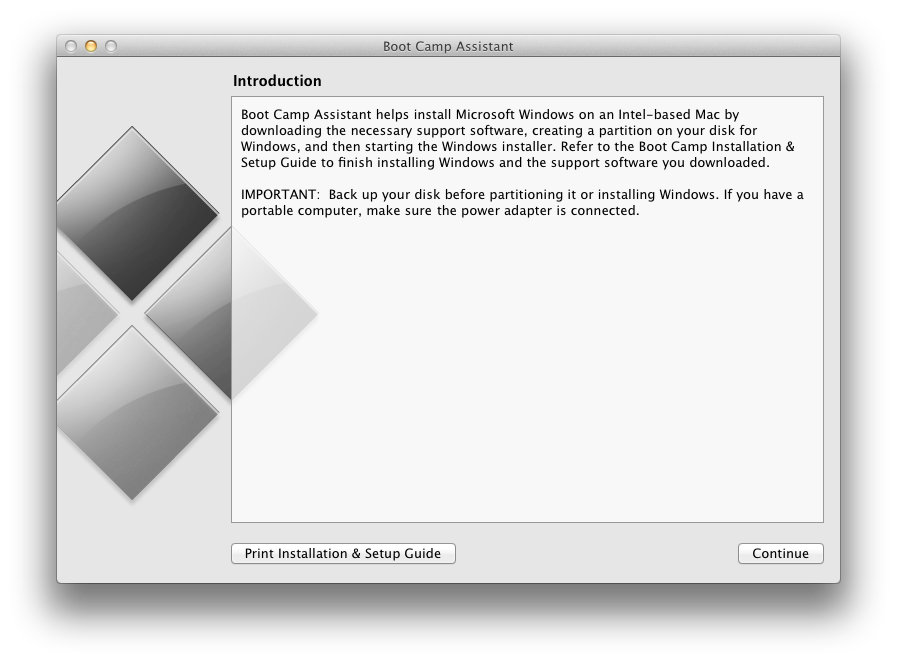
The Boot Camp Assistant will open. Click the Continue button.
Click here to enlarge

Step Four
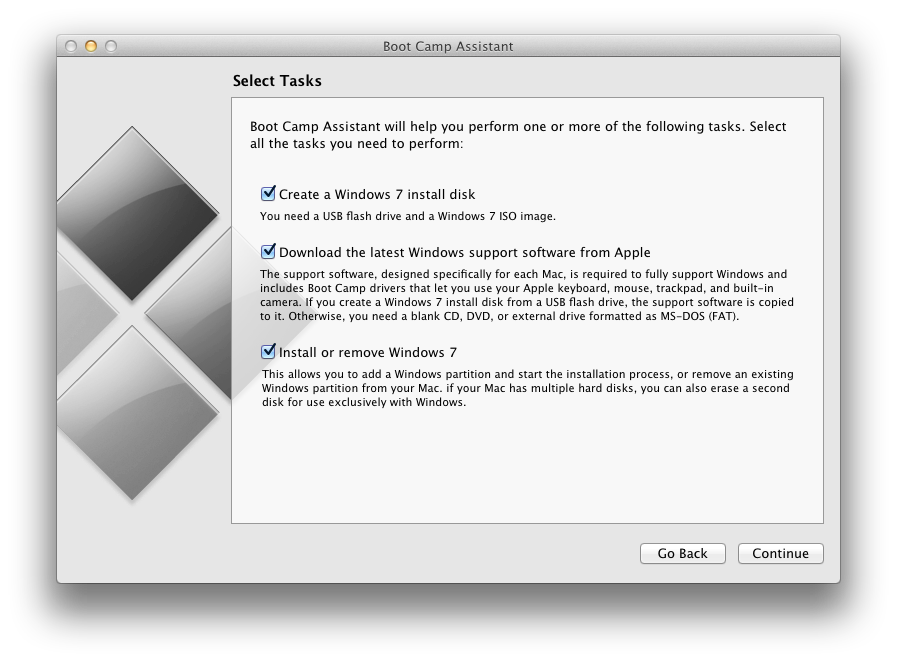
You will now be asked to select from a series of tasks. Leave all 3 tasks selected and click Continue.
Click here to enlarge

Step Five
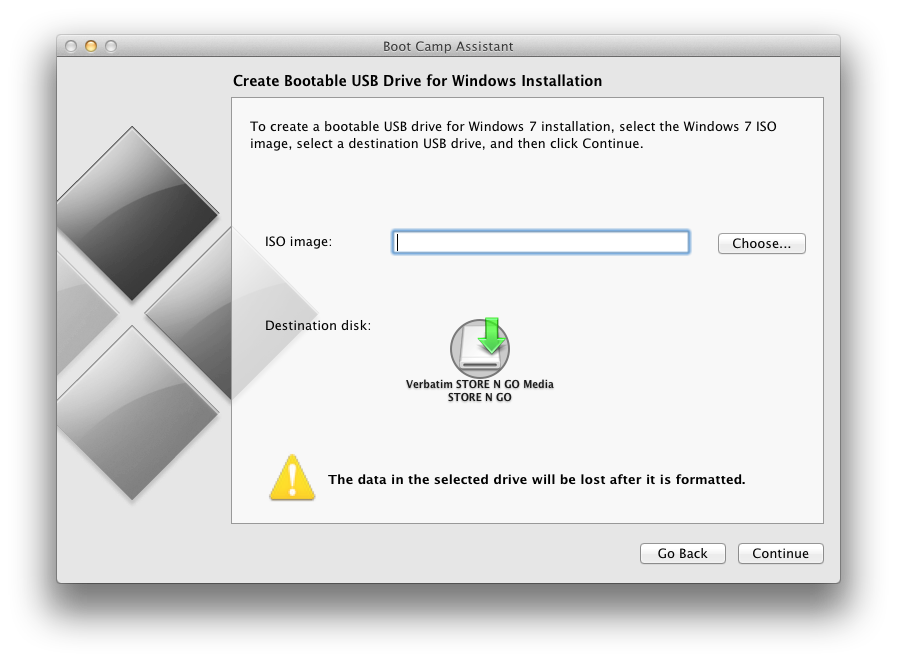
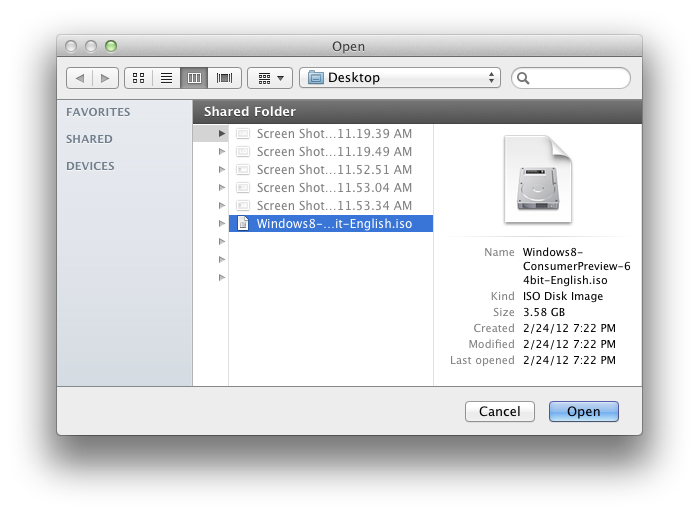
Click the Choose button, select the ISO you just downloaded, and click Open.
Click here to enlarge

Click here to enlarge

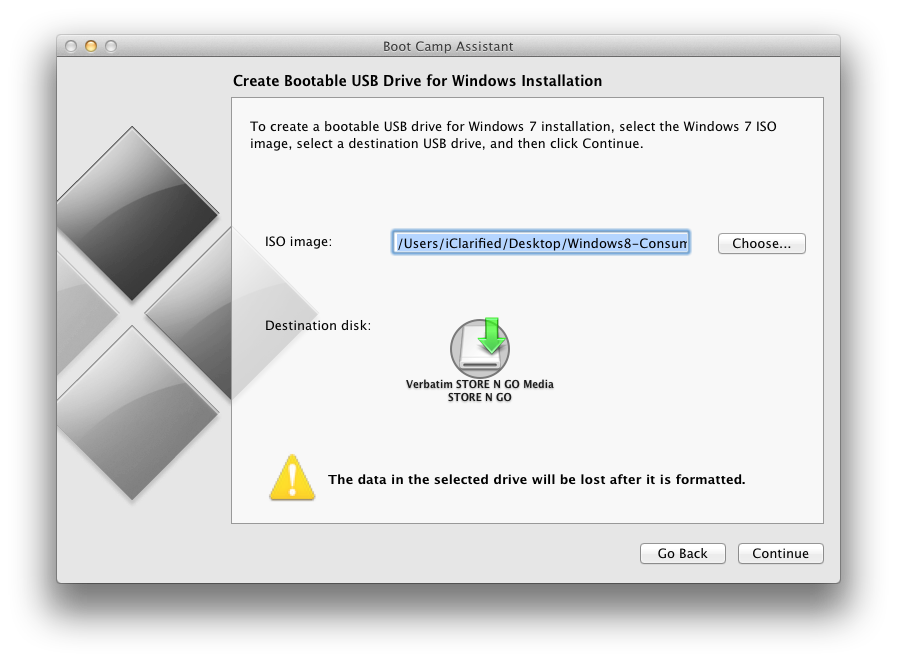
Make sure the correct USB flash drive is set as the destination disk and click the Continue button.
Click here to enlarge

Step Six
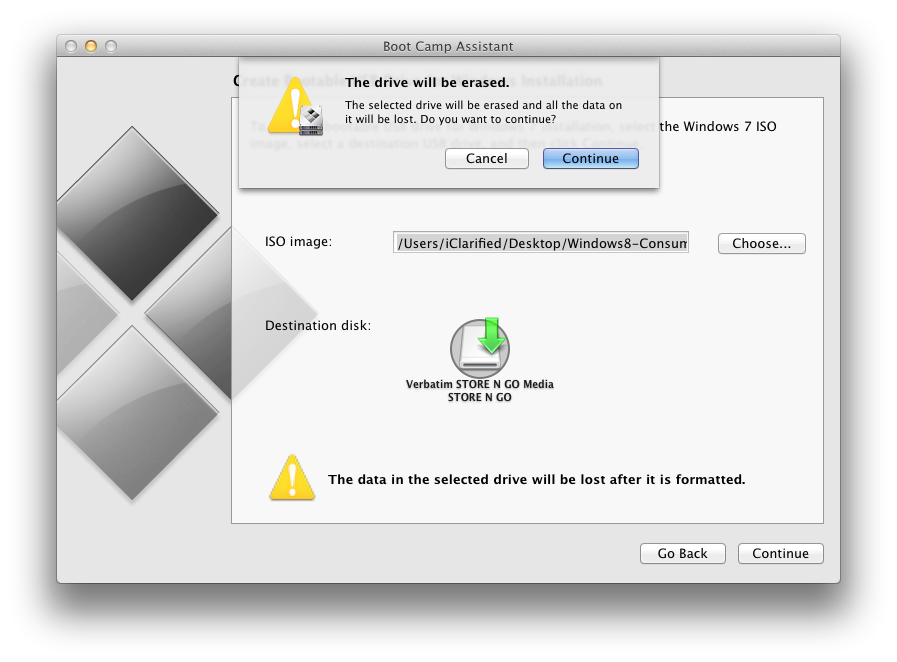
You will be warned that the drive will be erased. Click Continue.
Click here to enlarge

Step Seven
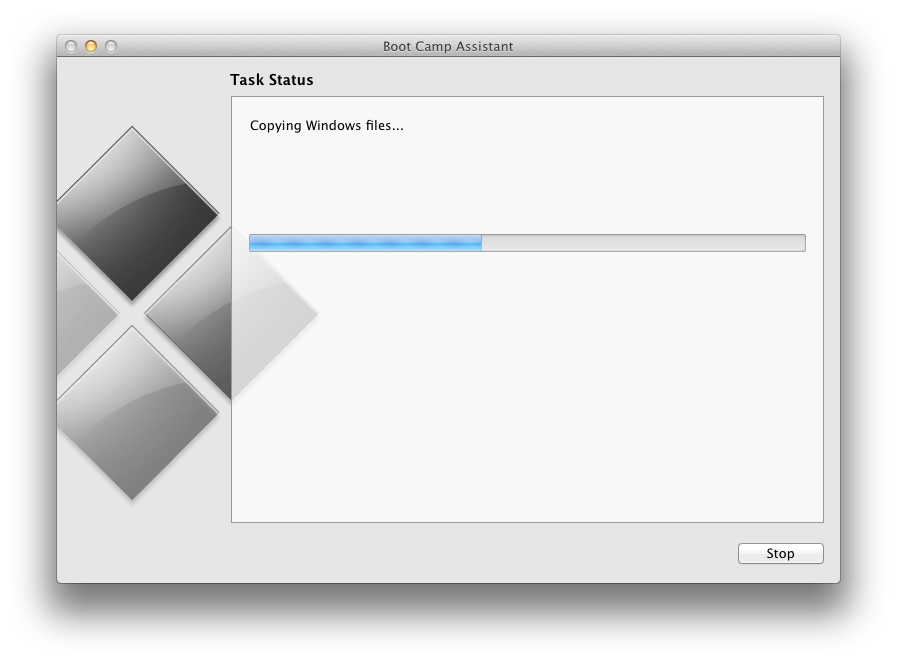
Boot Camp Assistant will now copy the Windows files to the USB flash drive.
Click here to enlarge

Step Eight
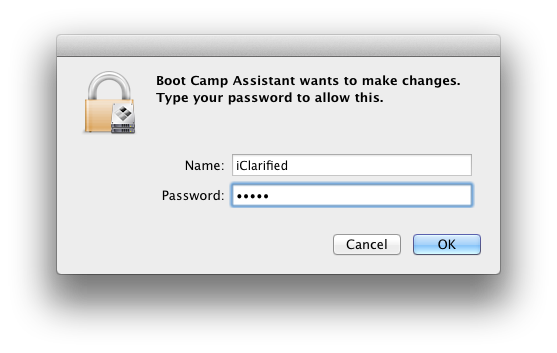
You will be asked to enter your Administrative username and password. Do this, then click the OK button.
Click here to enlarge

Step Nine
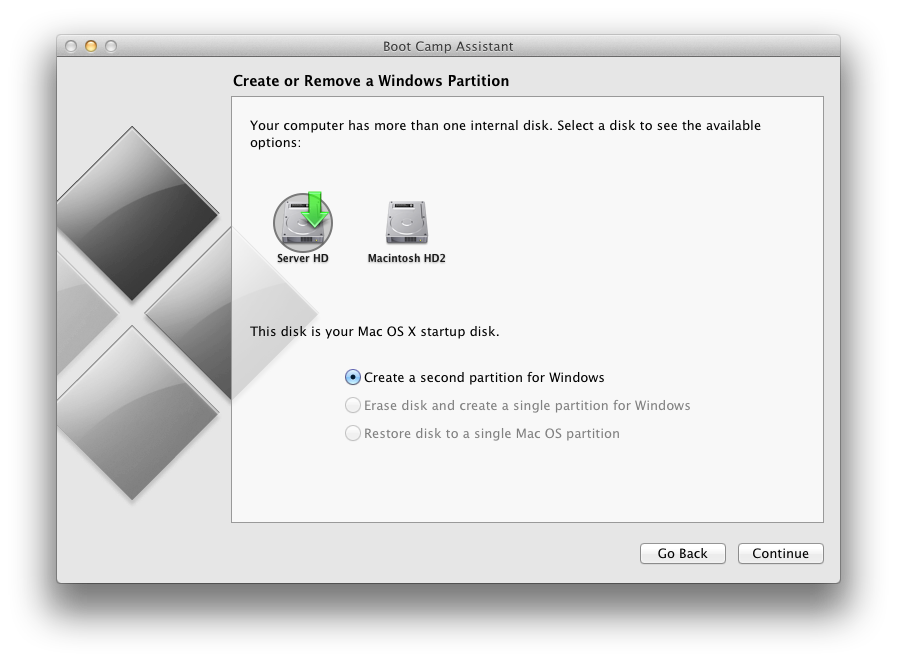
If you have more than one hard drive, you will be asked to select which system hard drive you would like to partition for Windows. Choose the correct hard drive and click the Continue button.
Click here to enlarge

Step Ten
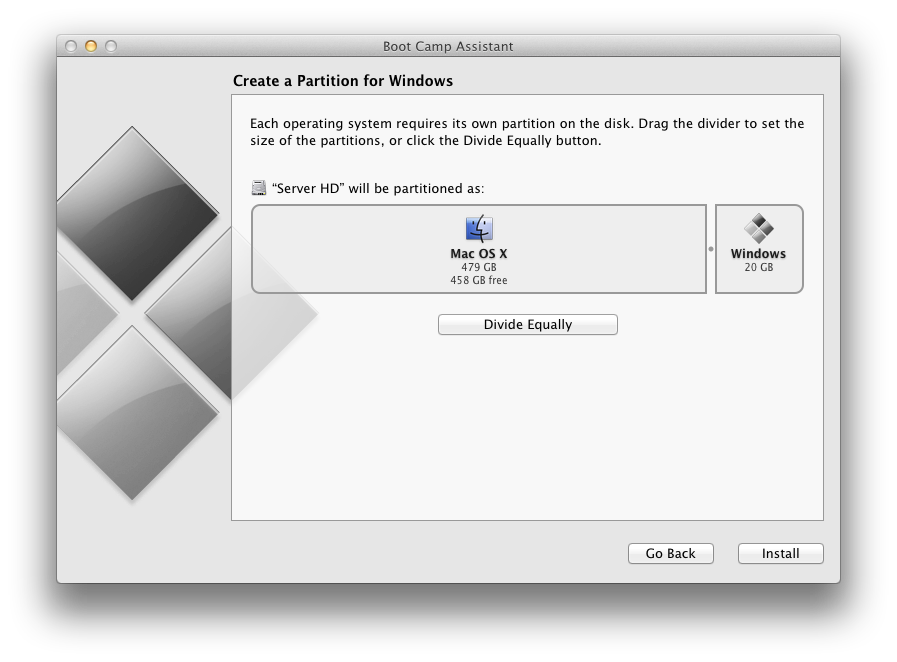
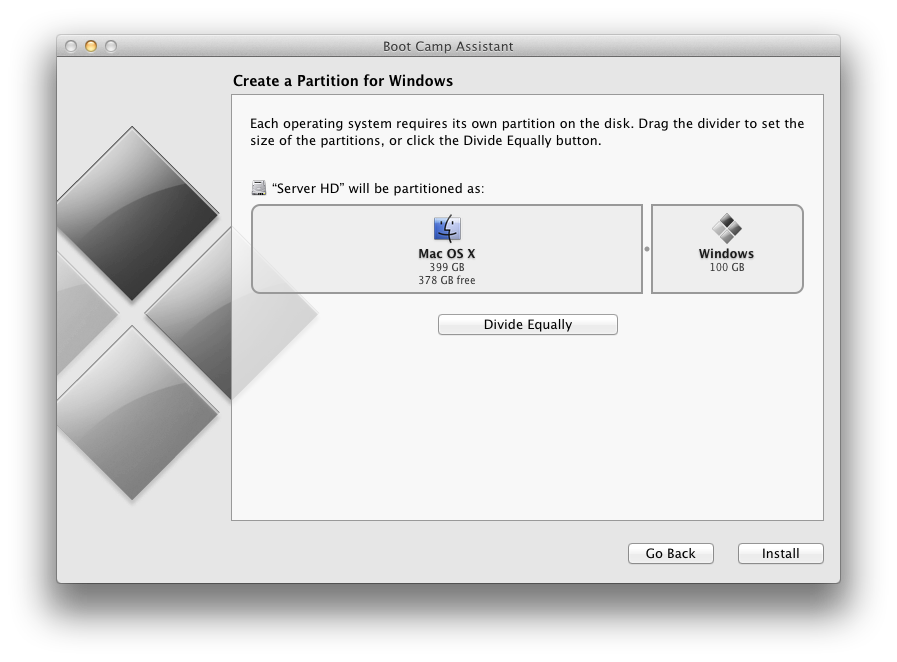
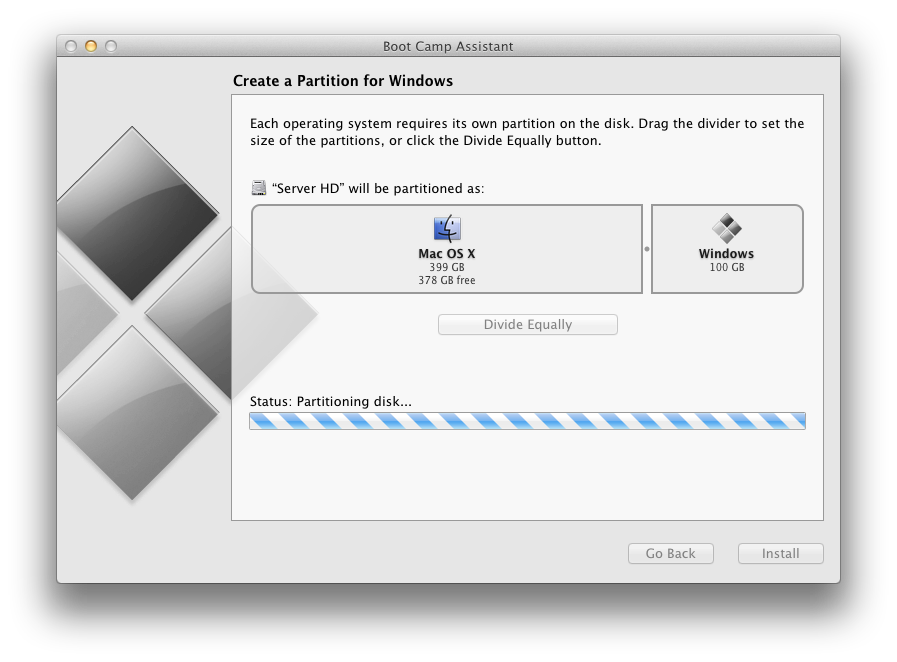
You will now be asked to Create a Partition for Windows. You can drag the divider to set the size of the partitions.
Click here to enlarge

Click here to enlarge

When satisfied with the size of your partition click the Install button.

Step Eleven
Boot Camp Assistant will now partition your disk.
Click here to enlarge

Step Twelve
Once the partition has been completed your computer will automatically be restarted and launch Windows setup from the USB flash drive.

Step Thirteen
Proceed through the Windows setup.

When asked whether to do a Upgrade or Custom (advanced) install, choose Custom (advanced).

When asked "Where do you want to install Windows?" select the partition labelled BOOTCAMP. Next click Drive Options then click Format. Click OK to confirm format and click Next to continue the installation.

Step Fourteen
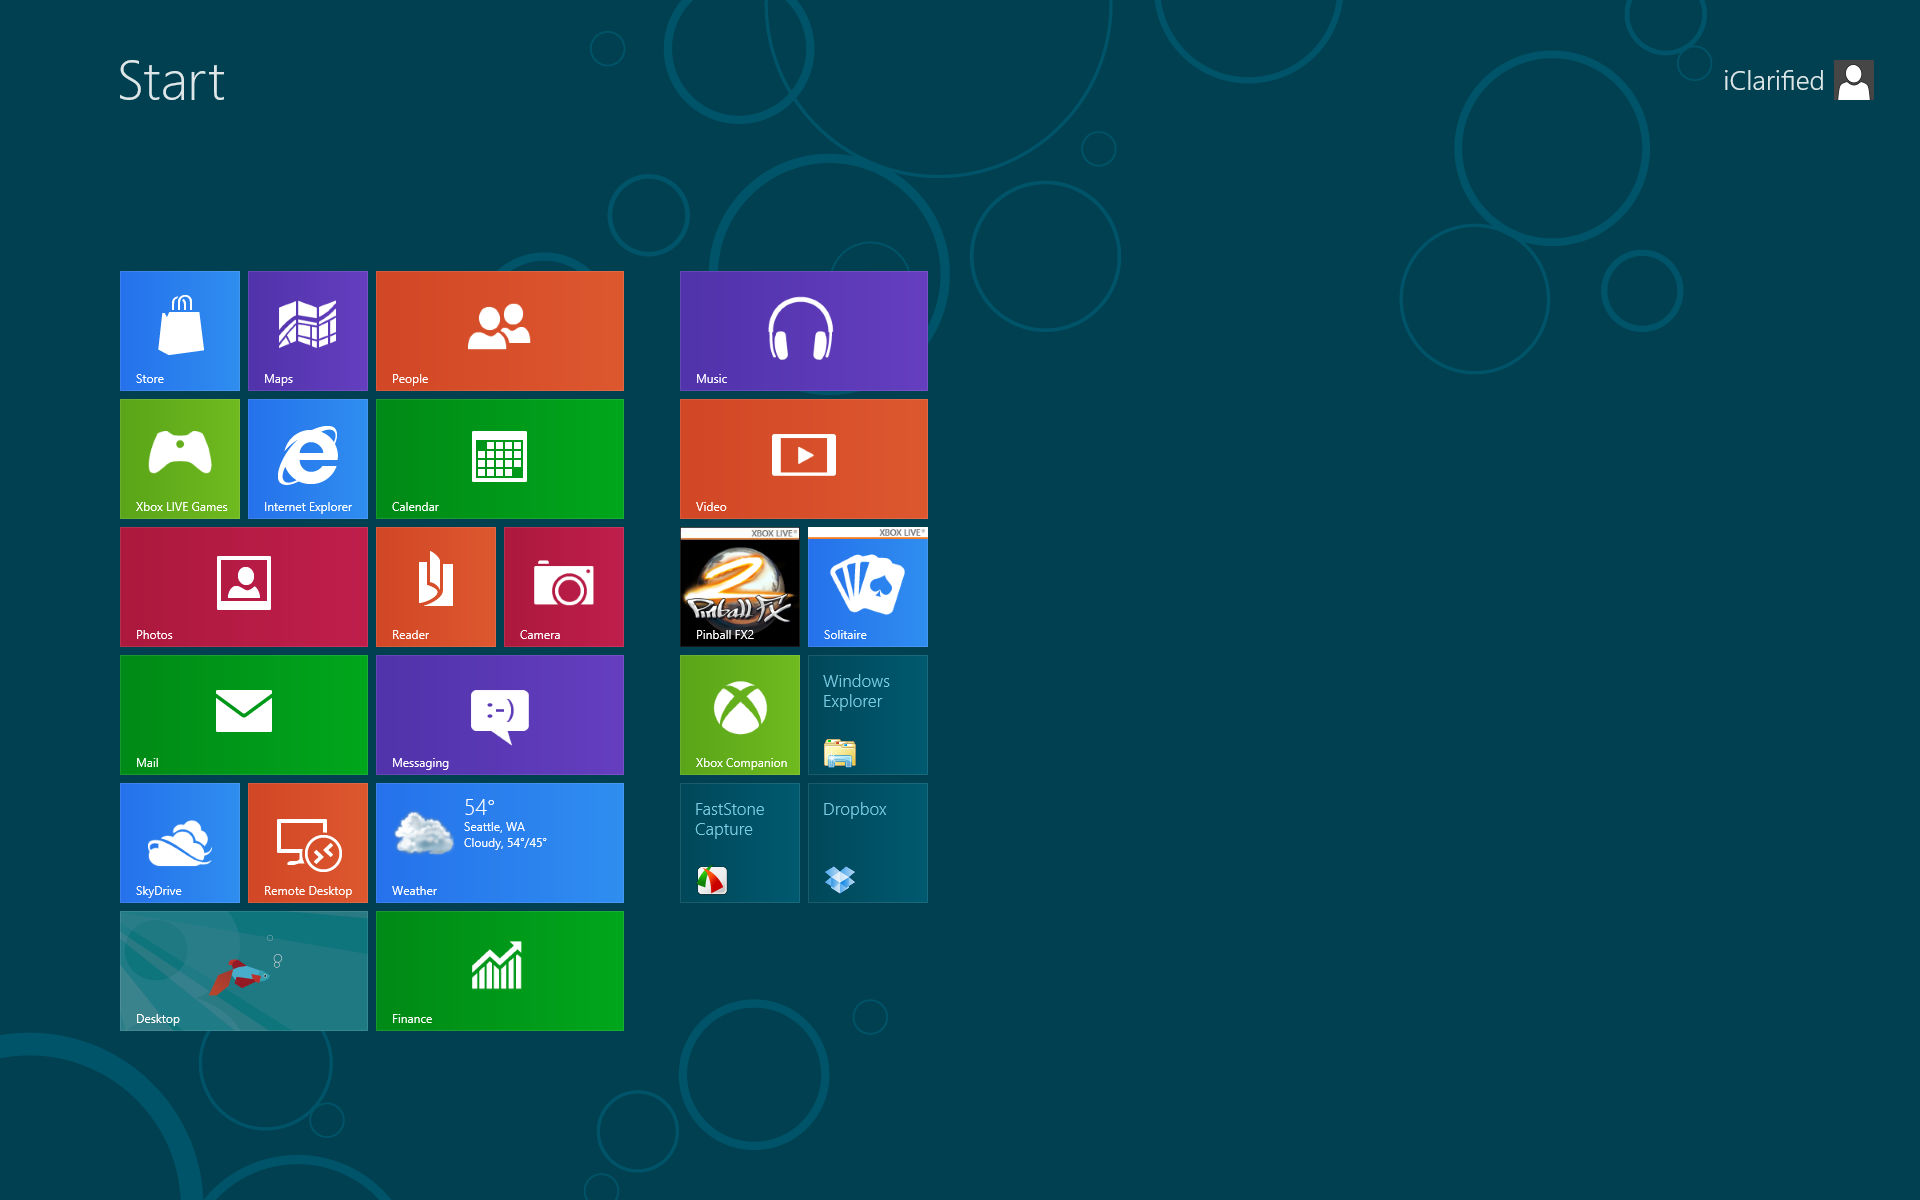
Once installation has completed successfully, click the Windows Explorer tile.
Click here to enlarge

Step Fifteen
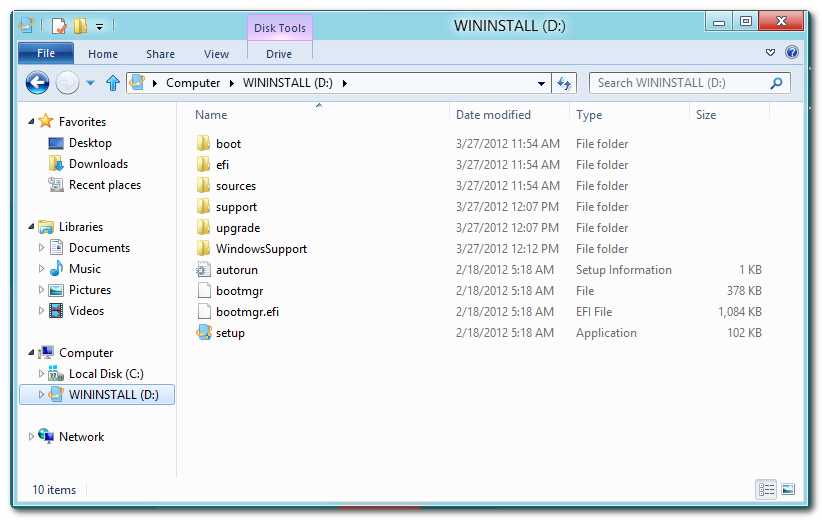
Select the WININSTALL USB flash drive from the list of devices under Computer and double click the WindowsSupport folder to open it.
Click here to enlarge

Step Sixteen
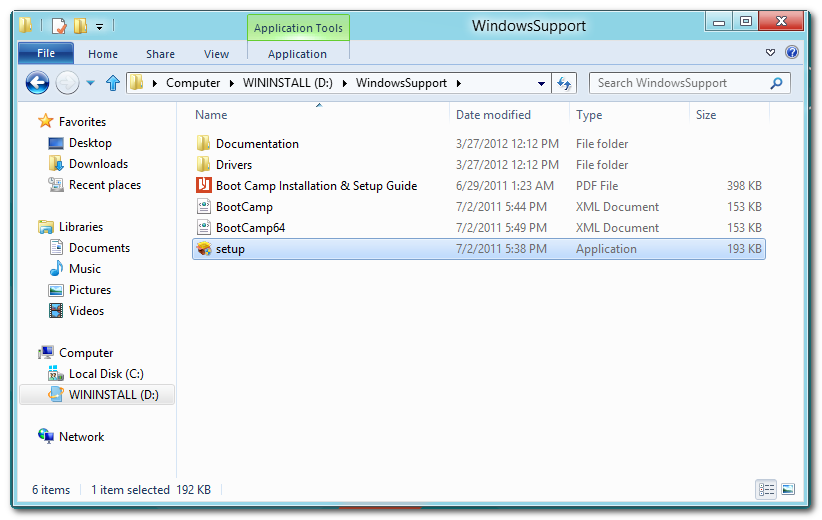
Double click setup to launch the executable.
Click here to enlarge

Step Seventeen
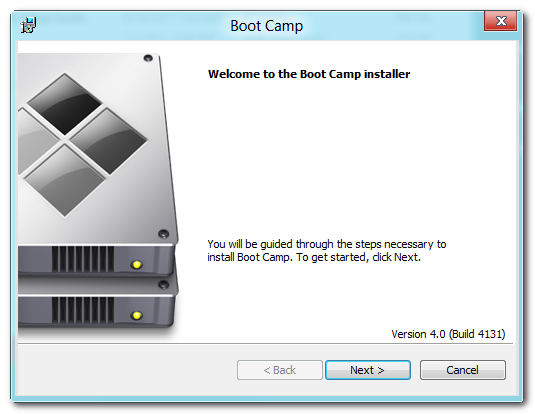
The Boot Camp Installer will appear to guide you through the steps necessary to install Boot Camp. Click the Next button to get started.
Click here to enlarge

Step Eighteen
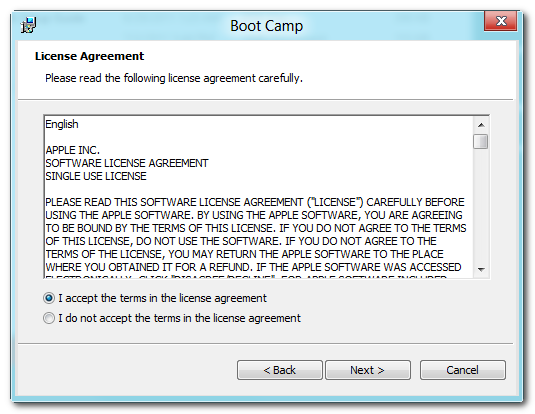
Read the license agreement, select I accept the terms in the license agreement, then click the Next button to continue.
Click here to enlarge

Step Nineteen
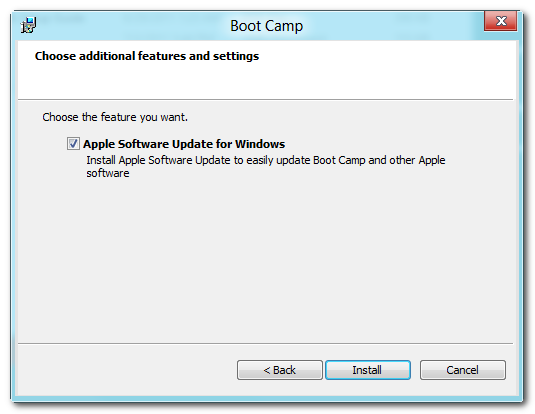
Choose whether you would like to install Apple Software Update for Windows then click the Install button.
Click here to enlarge

Step Twenty
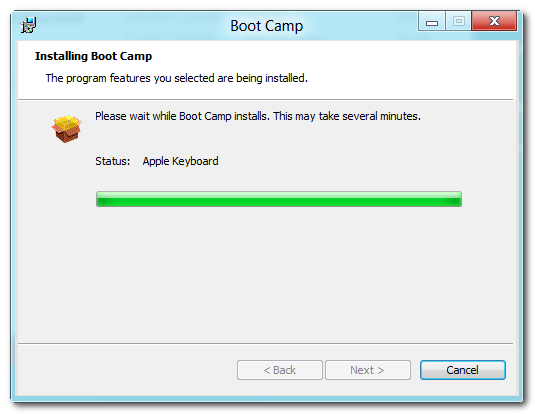
Boot Camp will proceed to install the drivers necessary for your Mac to work properly with Windows.
Click here to enlarge

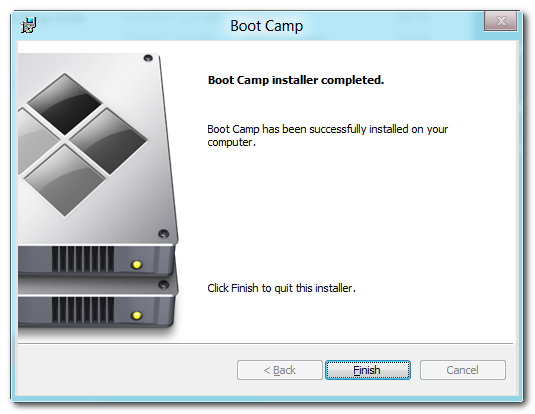
When the installation has completed click the Finish button.
Click here to enlarge

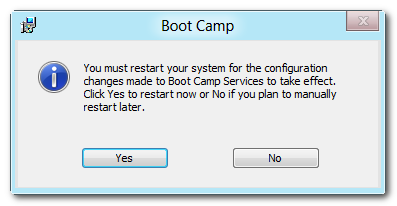
You will then be prompted to restart your system for the configuration changes to take effect. Click the Yes button.
Click here to enlarge

Step Twenty One
Once your system has restarted you will have successfully installed Windows 8 on your Mac using Boot Camp.
Click here to enlarge
Continue reading →

Remove a Windows Boot Camp Partition From Your Mac

These are instructions on how to remove a Windows Boot Camp partition and expand your Mac OS X partition to regain the newly available hard drive space.


Step One
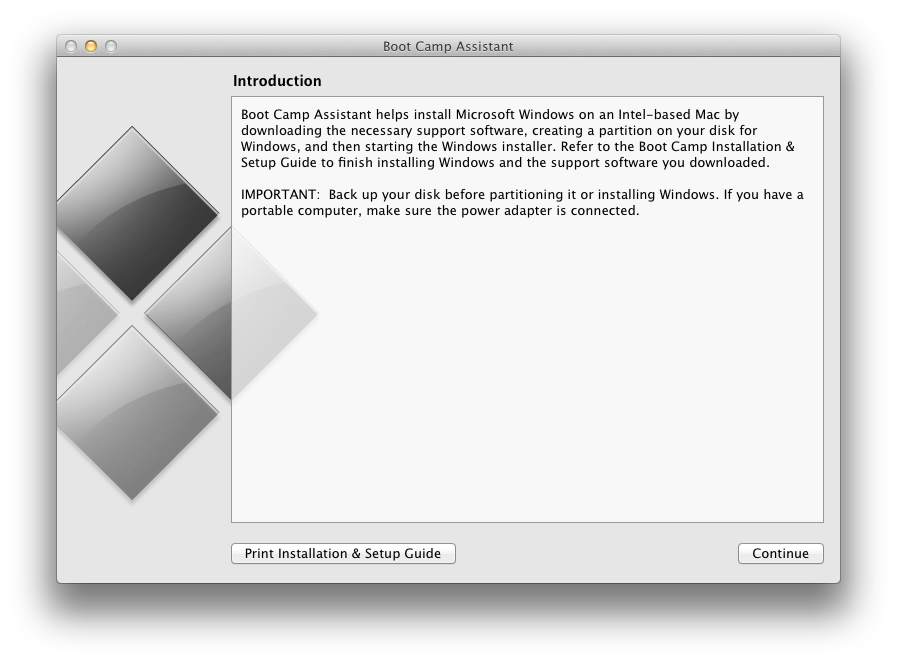
Launch Boot Camp Assistant from the Applications:Utilities folder.
Click here to enlarge

Step Two
Click the Continue button.
Click here to enlarge

Step Three
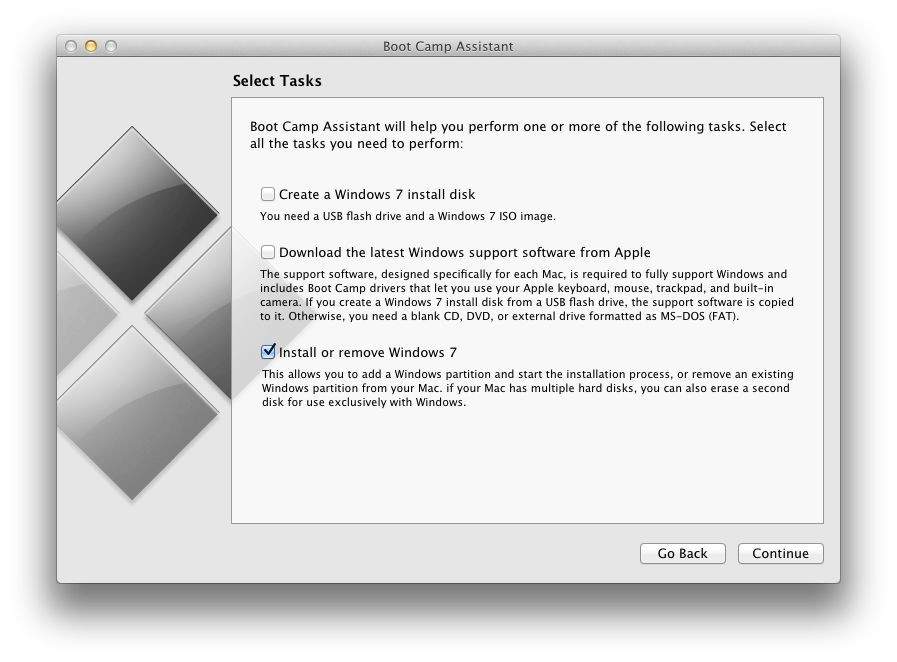
Check only the Install or remove Windows 7 option and click Continue.
Click here to enlarge

Step Four
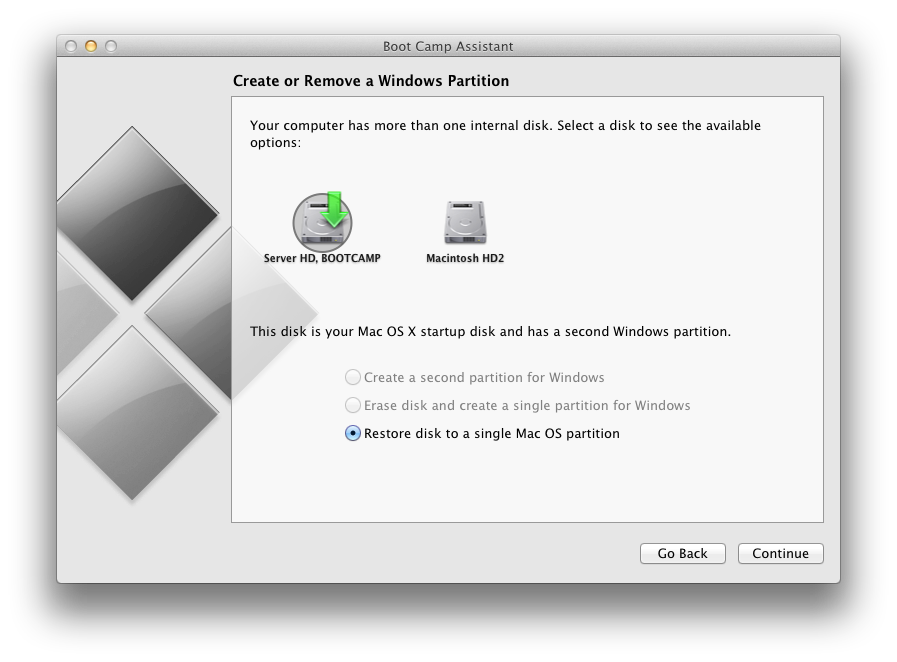
Choose Restore disk to a single Mac OS partition and click Continue.
Click here to enlarge

Step Five
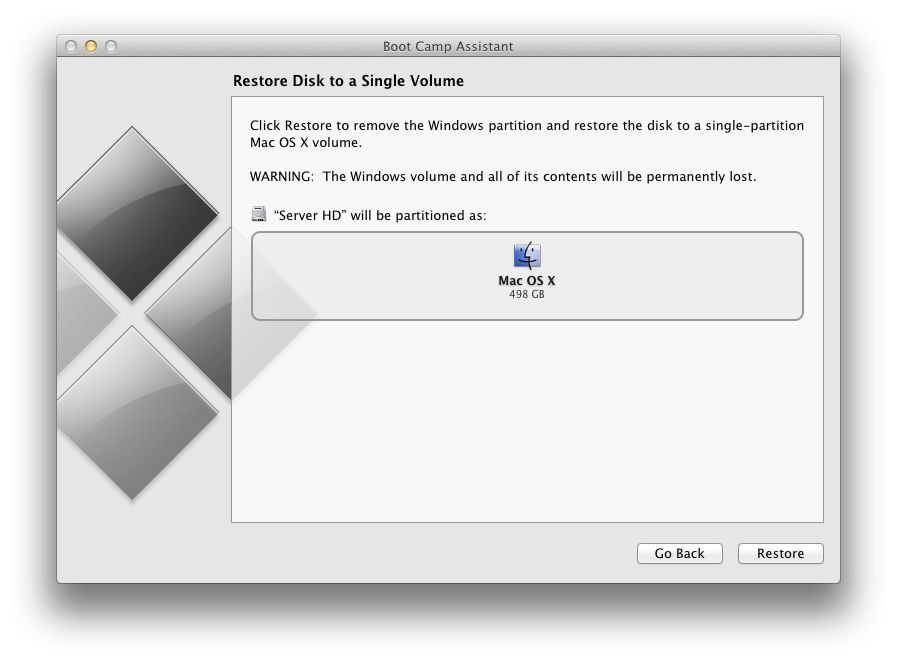
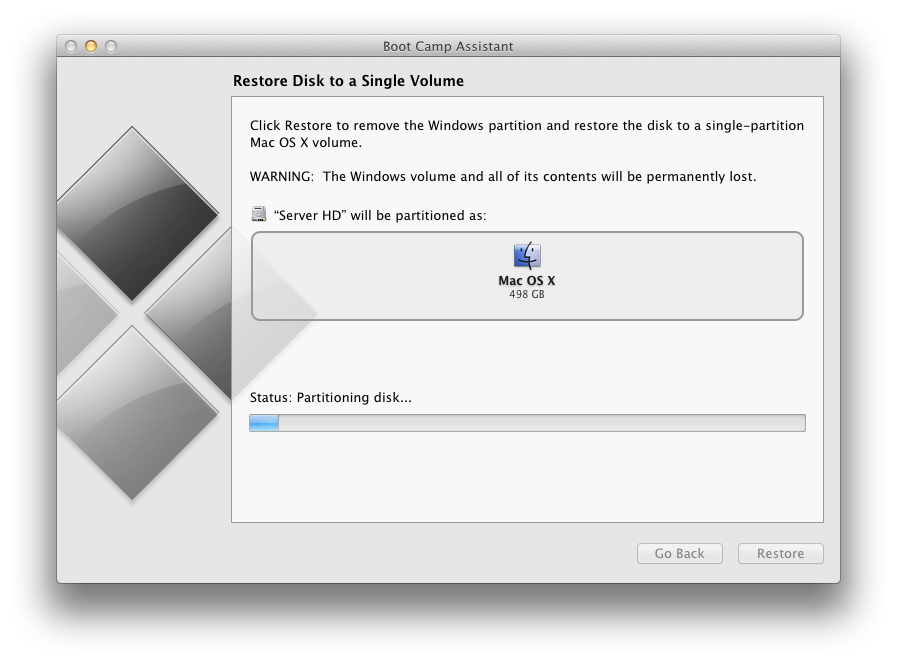
Click the Restore button to begin.
Click here to enlarge

Step Six
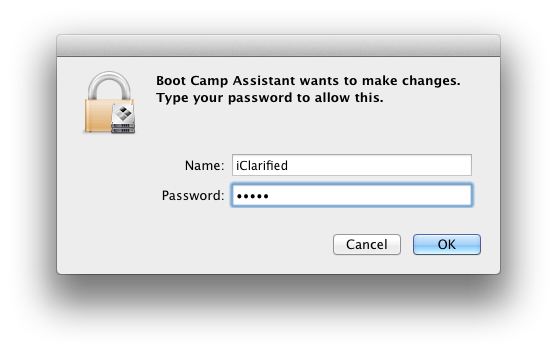
You will be asked to login with your Administrative username and password. Enter these and click the OK button.
Click here to enlarge

Step Seven
You disk will now be repartitioned to remove the Windows volume.
Click here to enlarge

Step Eight
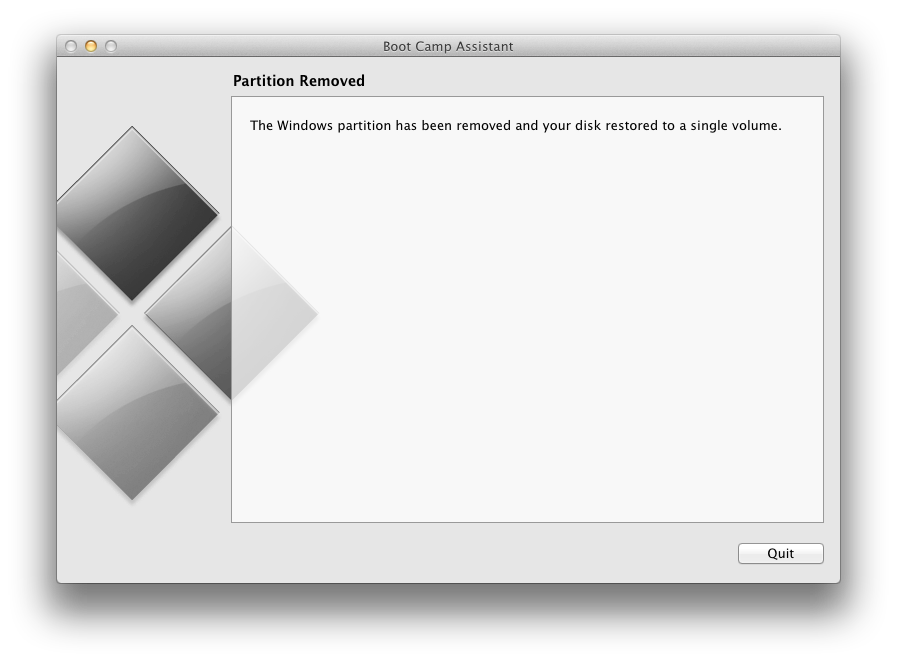
You will be informed that your disk has been restored as a single volume. Click the Quit button.
Click here to enlarge
Continue reading →

Minggu, 25 Maret 2012

windows 8 :Dual Boot Installation with XP


Got your hands on the Windows 8 beta and want to dual boot it alongside Windows XP? If you're dying to try out Windows 8 but aren't ready to give up your installation of XP or Vista, let's take a look at how to
dual boot Windows  with XP .our step-by-step tutorial to get you up and running with Microsoft's latest OS.

Install Windows 8 in other new partition not the same one with XP. So insert your Windows 8 disc and reboot your computer (you'll need to have enabled booting from your DVD drive in your system BIOS,
but most PCs will have this enabled by default).Once the DVD boots up it's a simple matter of following
along with the fairly simple installation wizard. When you're choosing installation type, be sure to select Custom (advanced) and choose the partition.

After you select the partition, just follow the steps tell the end of installation.then open your desktop.
and take a look in it.
so to let your windows XP boot you have to :

Open Control panel then scrol down and click on System.

 from system window click in left side on Advanced System settings

 In the Startup and Recovery section of the window that pops up, click the "Settings" button (on the Advanced tab of System Properties)


Change the "Default operating system" option from "Windows Developer Preview" to "Earlier Version of Windows and click OK

reboot your computer then you will get this boot window.

Everytime you shutdown and boot up select ‘Earlier version of Windows’ and you will be booted into Windows XP directly.

Continue reading →

Kamis, 15 Maret 2012

Geohot arrested for marijuana possession on way to SXSW talk


According to Above the Law, the original iPhone jailbreaker, Geohot, was arrested for felony possession of marijuana while at an international border crossing on his way to SXSW. According to the report, the arresting border patrol officers may have been outside of their jurisdiction (and likely measured improperly).


Before you rush to judge the guy, remember Steve Jobs’ thoughts on mind-altering substances (and phone hacking). If you have jailbroken using any of the “xxxRain” jailbreaking tools, you have used Geohot’s work. He also recently worked at both Google and Facebook (and Lady Gaga’s BackPlane).

He was still able to give his talk at SXSW, which is a pretty interesting (mp3).
Continue reading →

Rabu, 14 Maret 2012

Sn0wbreeze Updated To v2.9.3

Click here to enlarge


iH8sn0w has updated Sn0wbreeze to v2.9.3 with Apple TV support and bugs fixes. This version is mainly for users who dumped their SHSH blobs. On the initial boot, the Apple TV may have a black screen for 60 seconds after setting up the Apple TV. This is normal.

Sn0wbreeze v2.9.3 comes with:

  • Added Apple TV 2 support for iOS 4.4.3/4.4.4.
  • Fixed rare issues with iOS 5.0.1 where it would halt on the Apple upon boot.

Download Sn0wbreeze 2.9.3 here…
Continue reading →