Rabu, 03 Agustus 2011

How to Jailbreak Your iPod Touch 4G Using RedSn0w (Mac) [4.3.5]

These are instructions on how to jailbreak your iPod touch 4G on the 4.3.5 firmware using RedSn0w for Mac. If you are on 4.3.3 or lower make sure you do NOT update to iOS 4.3.5. Use the untethered JailbreakMe instead.

Step One


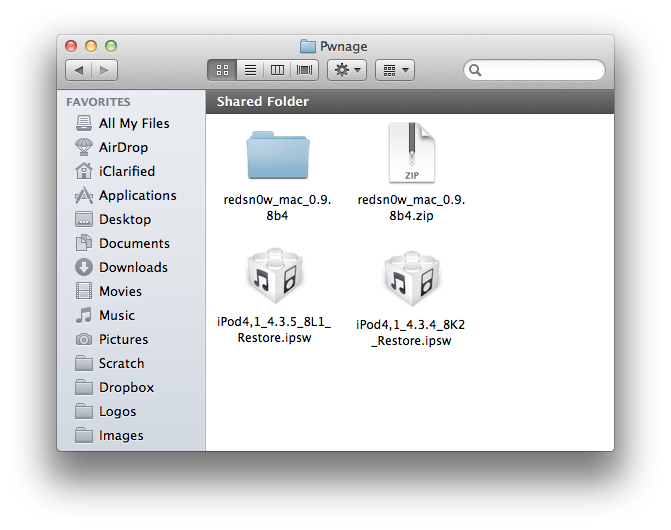
Create a folder on your desktop called Pwnage

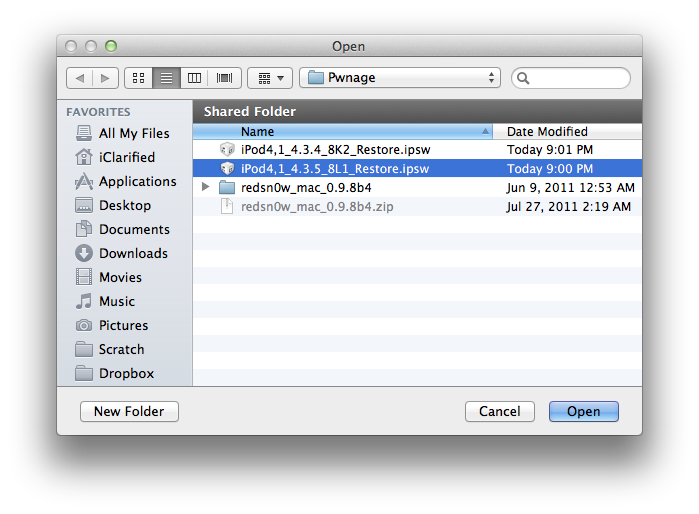
Download RedSn0w from here and place it in the Pwnage folder. Likewise, download the latest 4.3.5 firmware from below and place it in the same folder.

4.3.4 (4G): iPod4,1_4.3.4_8K2_Restore.ipsw
4.3.5 (4G): iPod4,1_4.3.5_8L1_Restore.ipsw

Extract the RedSn0w zip file by double clicking it.
Click here to enlarge

Step Two
Connect your iPod to the computer and launch iTunes.

Click here to enlarge

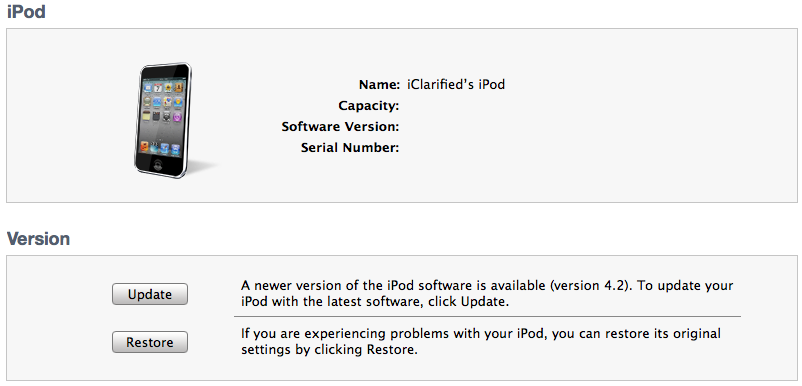
Select your iPod from the list of devices on the left. Now hold down Option and click the Restore button. Restore is preferred as it won't create any wasted space on your iPod.

Click here to enlarge

Navigate to the Pwnage folder on your desktop and select the 4.3.5 firmware ipsw. Click the Choose button to continue.

Click here to enlarge

Step Three
Once iTunes has finished updating your iPod to the desired firmware open the Pwnage folder on your desktop and launch the redsn0w application from the redsn0w folder we extracted earlier.

Click here to enlarge

Step Four
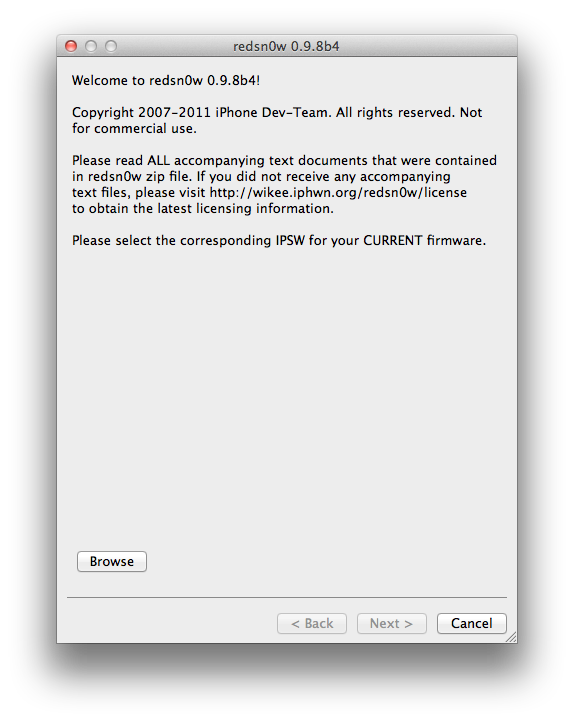
Once RedSn0w opens click the Browse button

Click here to enlarge

Step Five
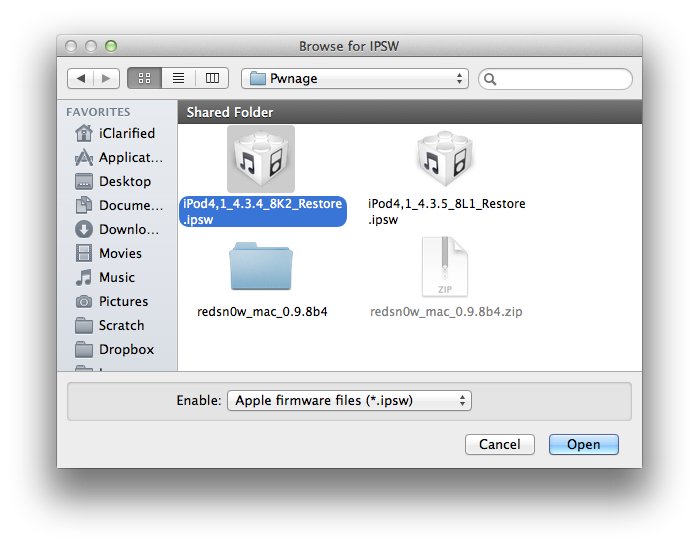
Select the 4.3.4 firmware ipsw we placed in the Pwnage folder on our desktop then click Open.

Click here to enlarge

Step Six
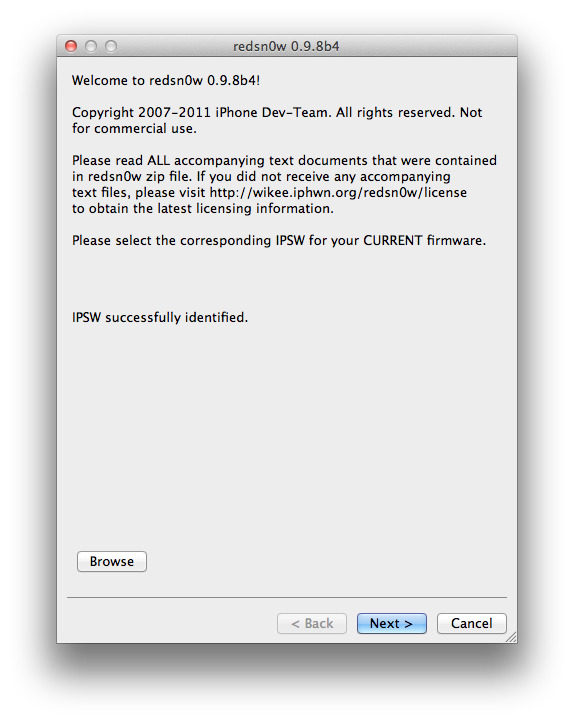
Once the firmware has been verified click the Next button to continue.

Click here to enlarge

Step Seven
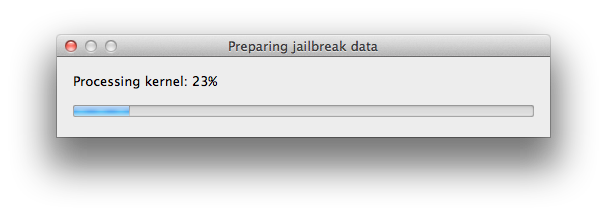
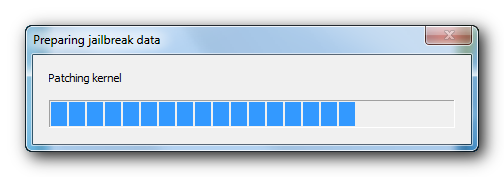
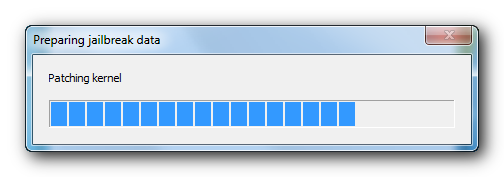
RedSn0w will now prepare the jailbreak data

Click here to enlarge

Step Eight
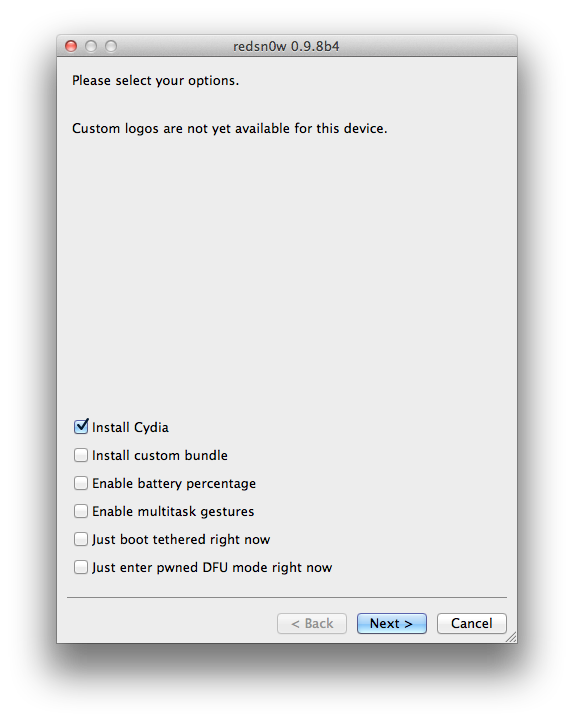
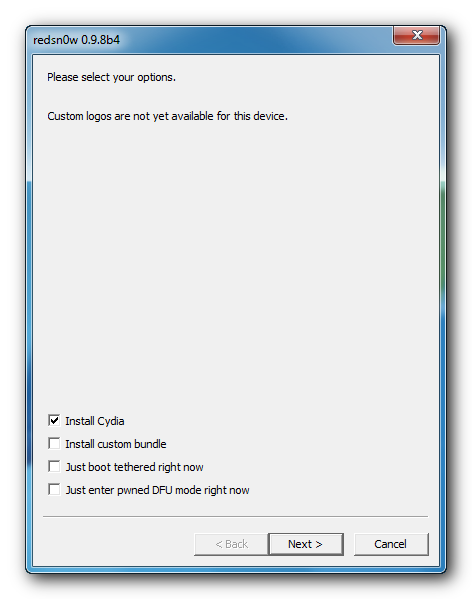
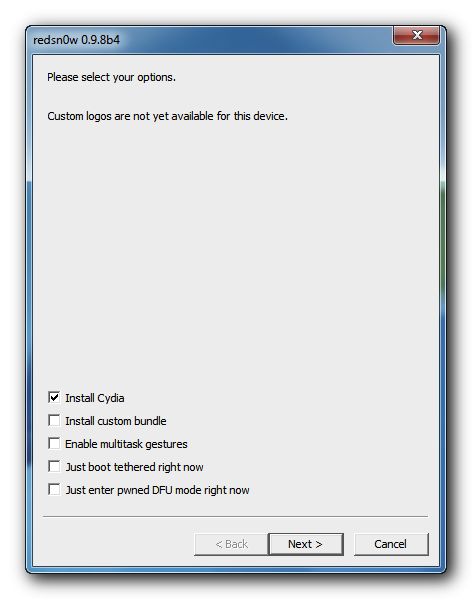
From this window you can select the jailbreak options you would like.


Make sure Cydia is selected and click the Next button to continue.
Click here to enlarge

Step Nine
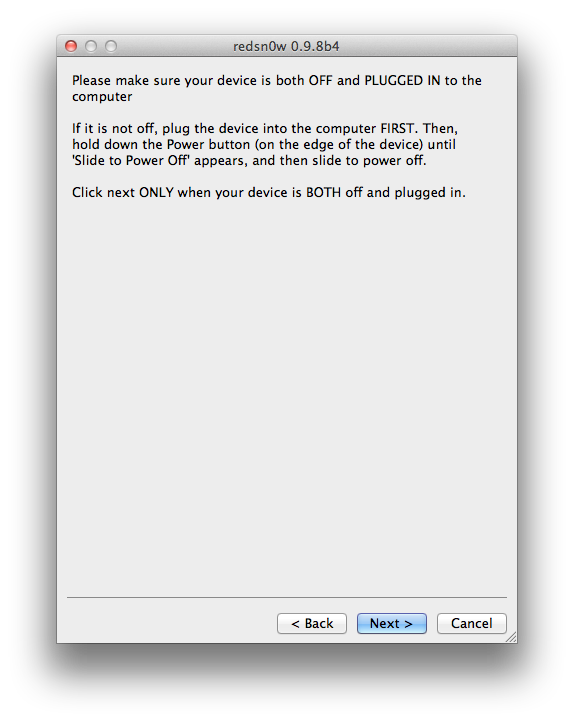
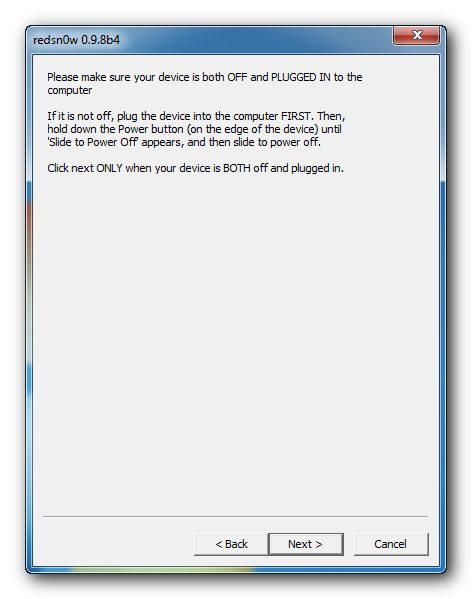
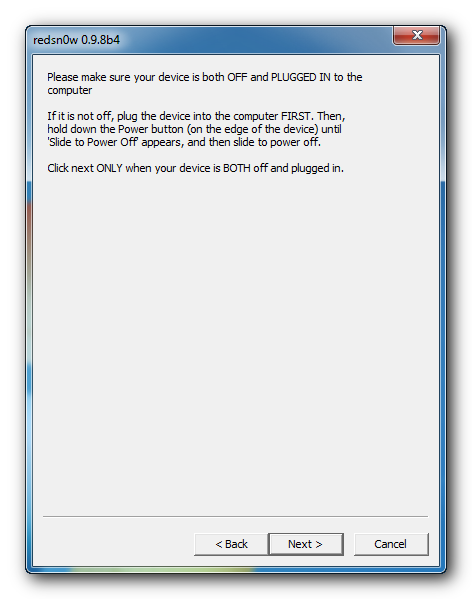
Please plug your iPod into the computer and make sure its OFF then click the Next button

Click here to enlarge

Step Ten
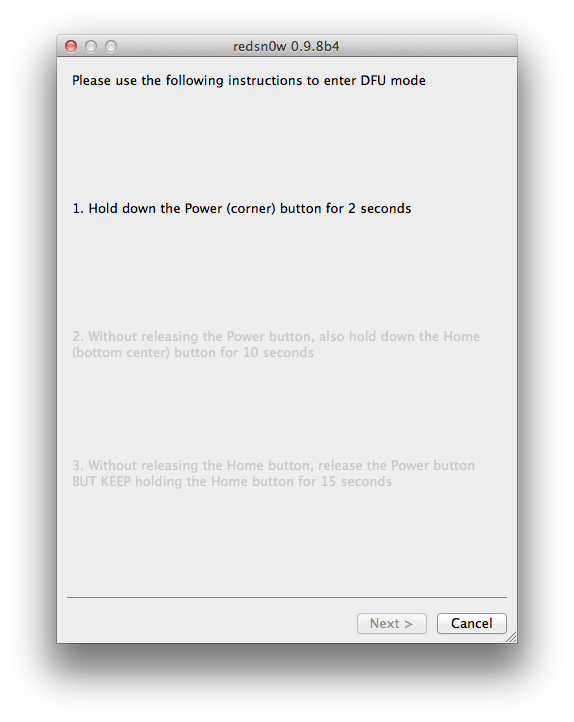
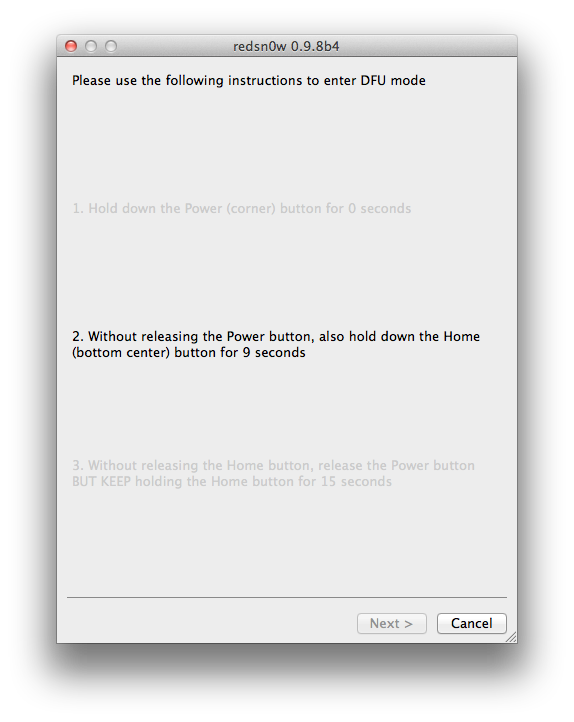
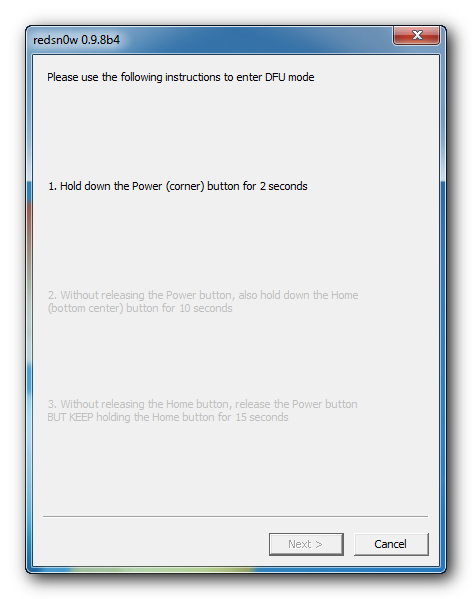
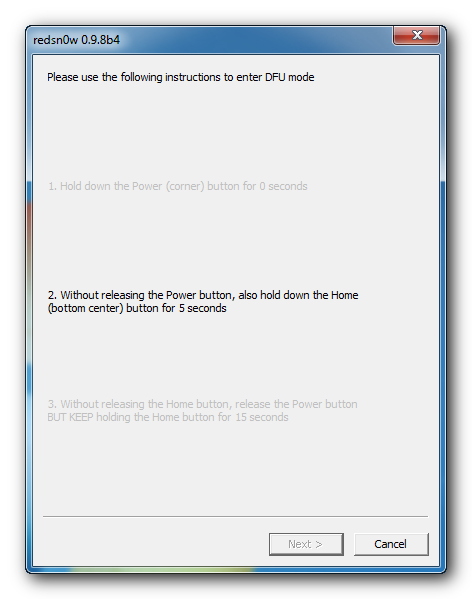
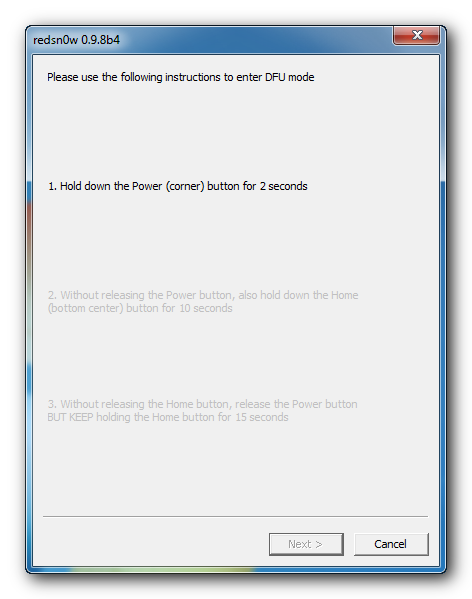
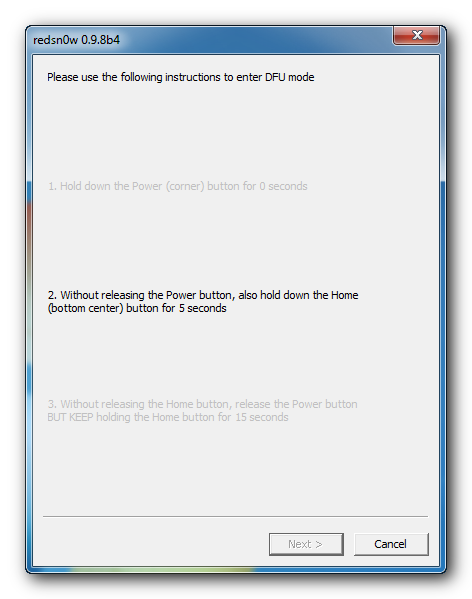
RedSn0w will now guide you through the steps to get into DFU mode.

Click here to enlarge

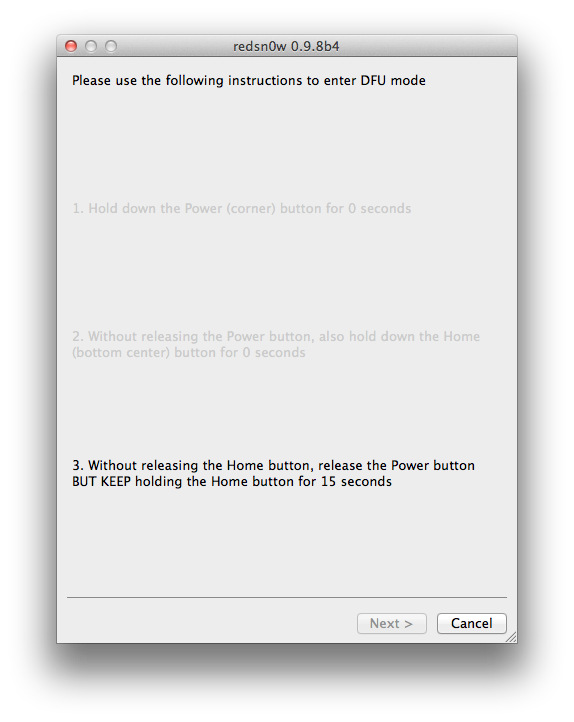
Hold down both the Home button and the Power button for 10 seconds.


Click here to enlarge

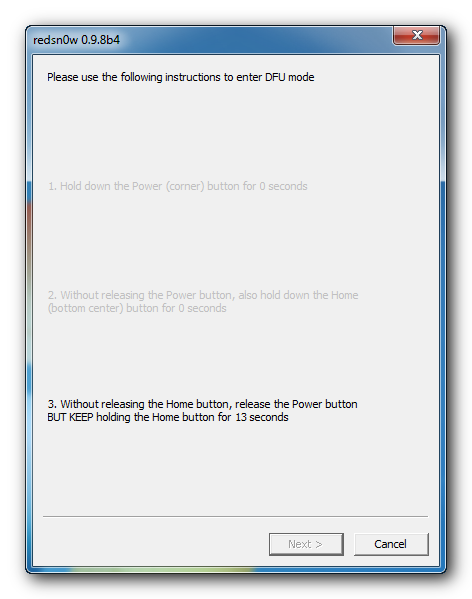
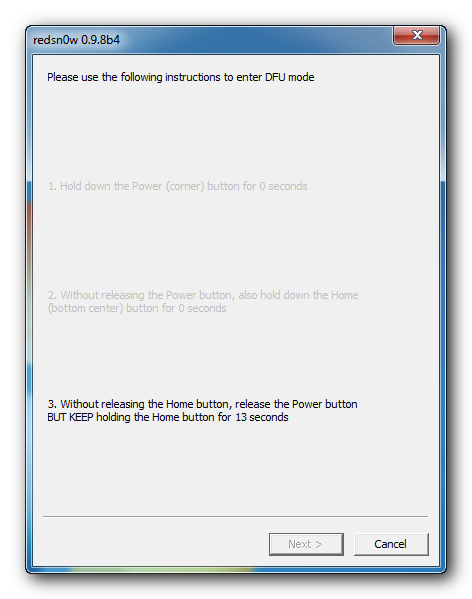
Release the Power button and continue holding the Home button until RedSn0w detects the device.

Click here to enlarge

Step Eleven
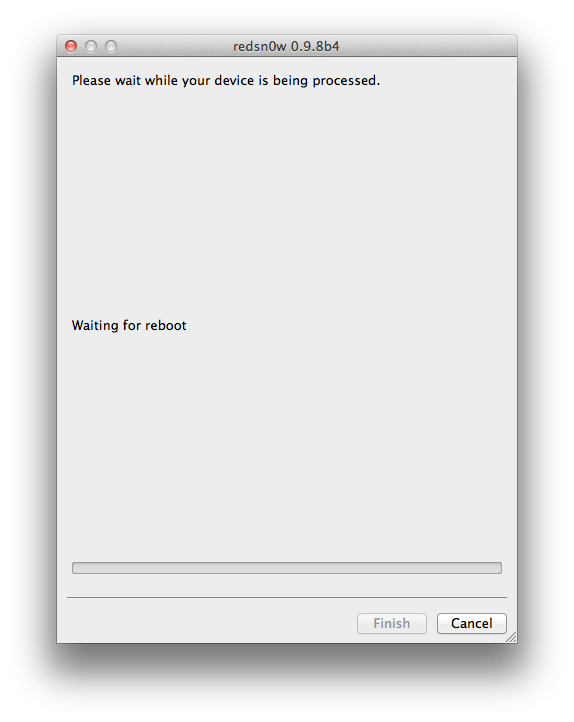
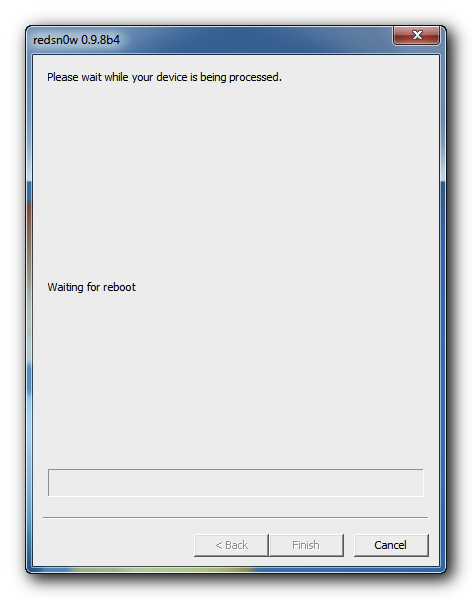
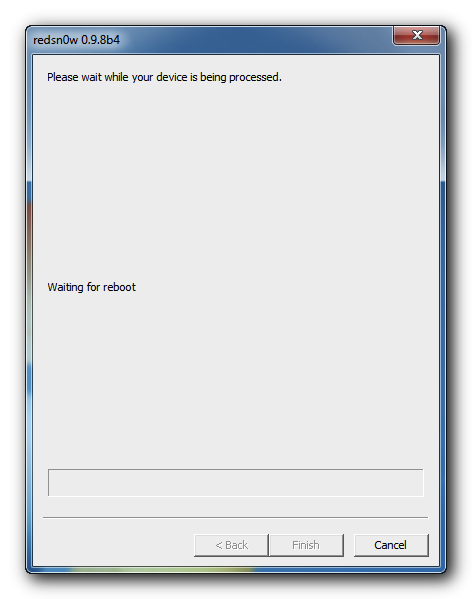
Your iPod will now reboot

Click here to enlarge

Step Twelve
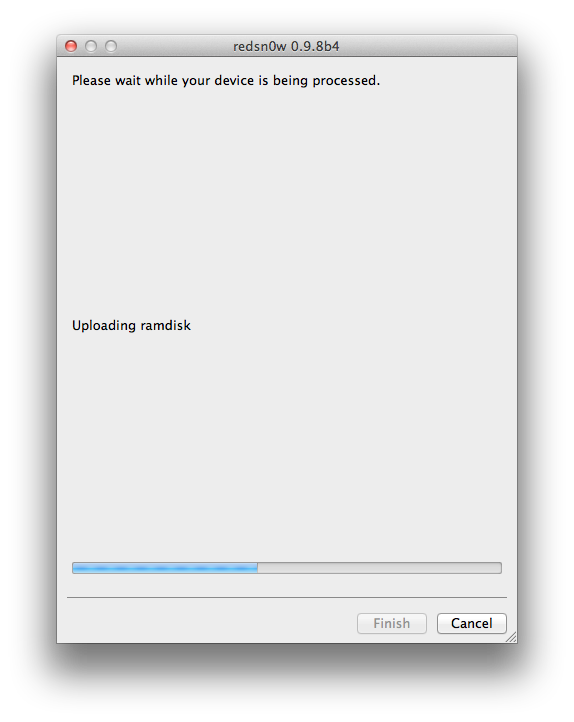
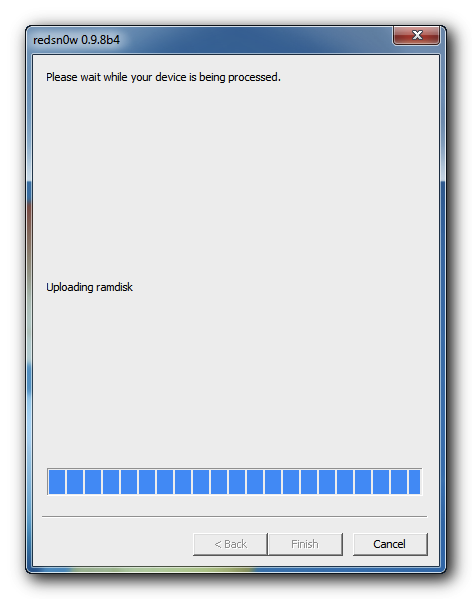
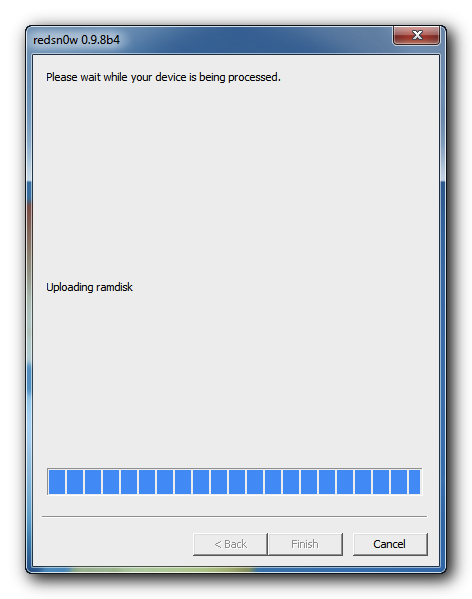
RedSn0w will then begin uploading the new RAM Disk and Kernel.

Click here to enlarge

Step Thirteen
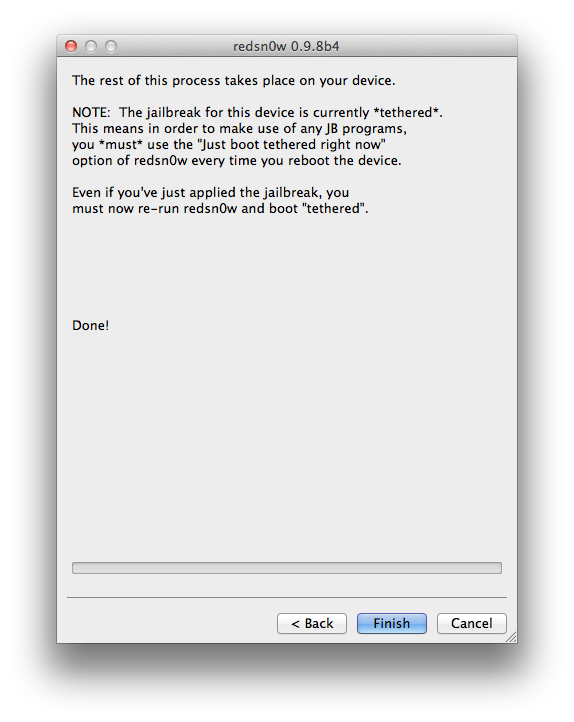
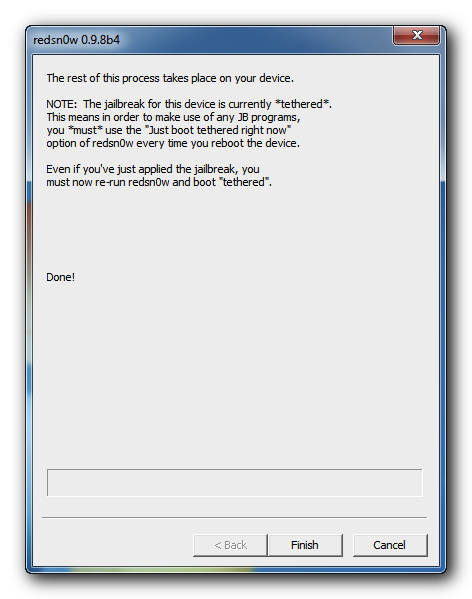
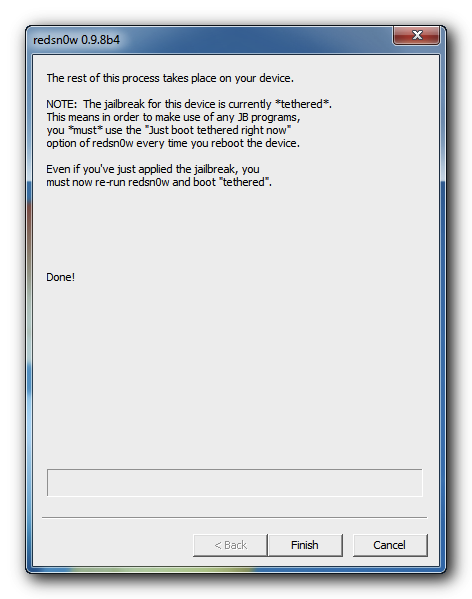
Once this is complete you will be notified that RedSn0w is done. Click the Finish button. When your iPod finishes rebooting (5 minutes or so) it will be jailbroken with Cydia on the SpringBoard.

Click here to enlarge


BOOT TETHERED
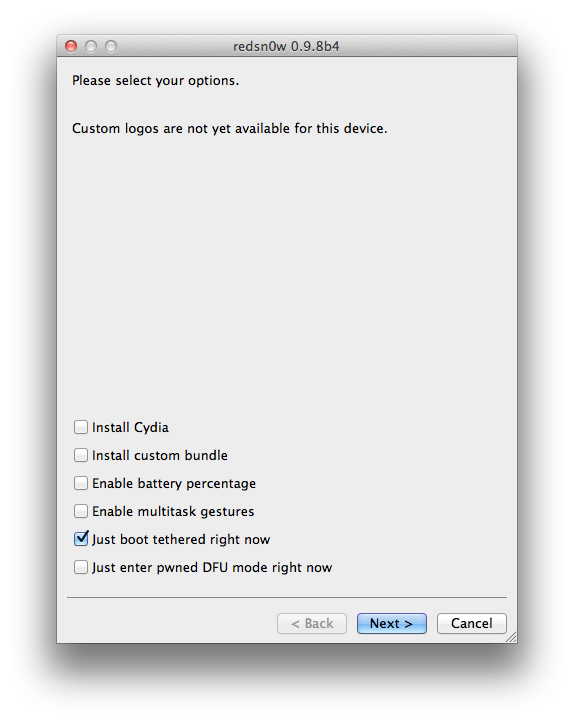
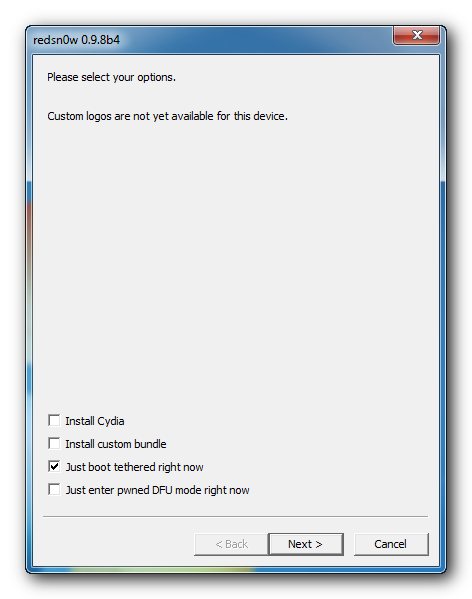
Once RedSn0w has finished jailbreaking your device you will need to boot it tethered. Rerun RedSn0w and this time select Just boot tethered right now from the list of options instead of installing Cydia.

Click here to enlarge

*As usual a big thanks to the iPhone Dev-Team and Geohot for their hard work and contribution to the iPhone community.
Continue reading →

How to Jailbreak Your iPad 1 Using RedSn0w (Windows) [5.0b4]

These are instructions on how to jailbreak your iPad 1 on the 5.0b4 firmware using RedSn0w for Windows. Since iOS 5.0 has not yet been released these are instructions for developers only. This procedure will not hacktivate so you must have your UDID registered with a developer, and it is tethered.

If you want to jailbreak a lower firmware version you can find the appropriate tutorial here.

Step One
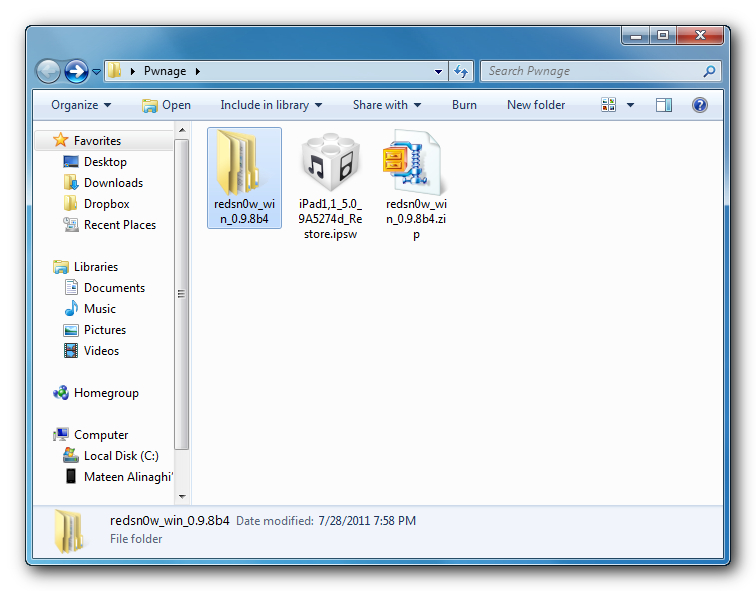
Create a folder on your desktop called Pwnage

Download RedSn0w from here and place it in the Pwnage folder. Likewise, download the latest 5.0 firmware from iOS Dev Center and place it in the same folder.

5.0b4 (iPad 1): iPad1,1_5.0_9A5274d_Restore

Extract the RedSn0w zip file into the same folder.
Click here to enlarge

Step Two
Connect your iPad to the computer and launch iTunes.
Click here to enlarge

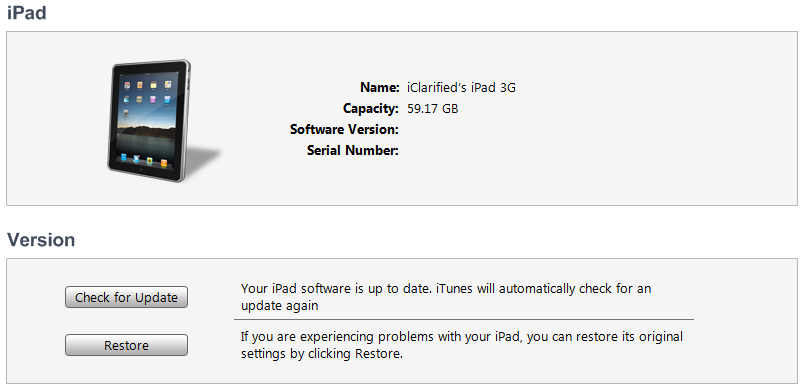
Select your iPad from the list of devices on the left. Now hold down Shift and click the Restore button. Restore is preferred as it won't create any wasted space on your iPad.
Click here to enlarge

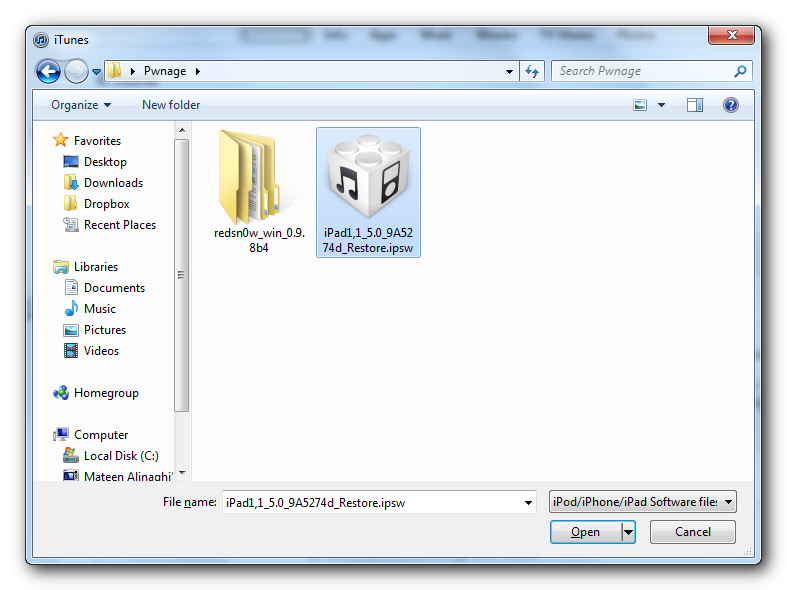
Navigate to the Pwnage folder on your desktop and select the 5.0 firmware ipsw. Click the Choose button to continue.
Click here to enlarge

Step Three
Once iTunes has finished updating your iPad to the desired firmware open the Pwnage folder on your desktop and launch the redsn0w application from the redsn0w folder we extracted earlier.

**Windows 7 users may need to run RedSn0w in Vista Compatibility mode. You can do this by right clicking the executable and selecting Properties from the contextual menu.
Click here to enlarge

Step Four
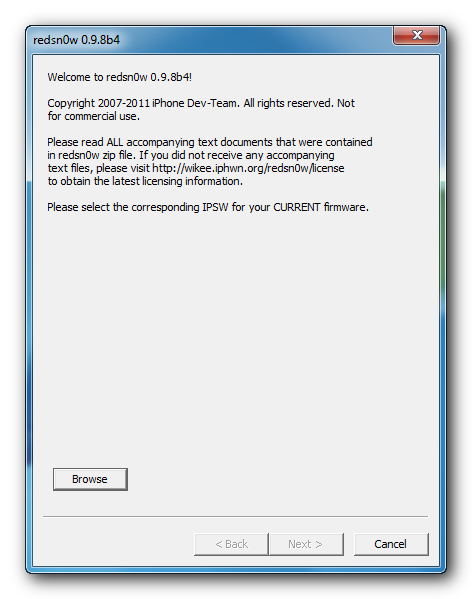
Once RedSn0w opens click the Browse button
Click here to enlarge

Step Five
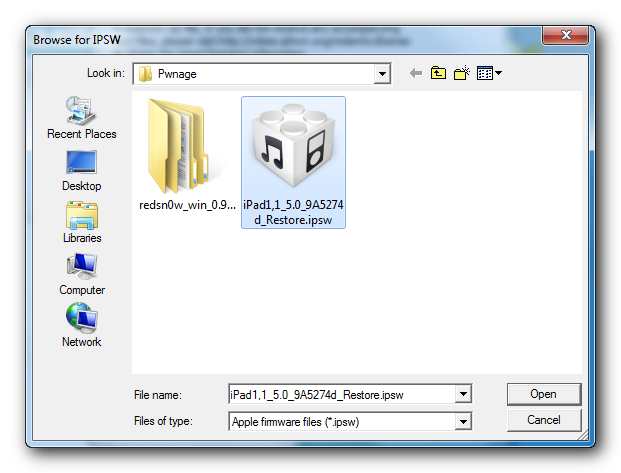
Select the 5.0 firmware ipsw we placed in the Pwnage folder on our desktop then click Open.
Click here to enlarge

Step Six
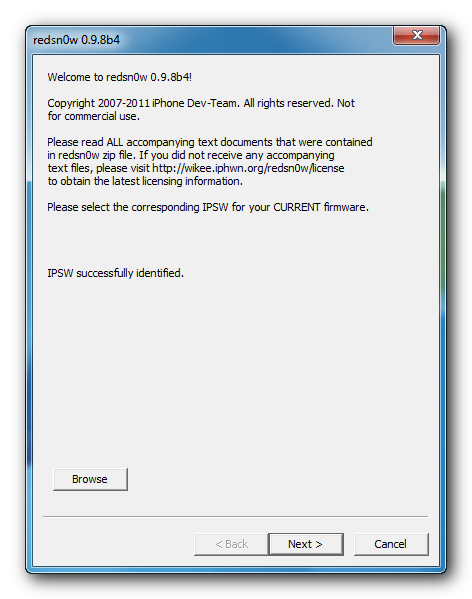
Once the firmware has been verified click the Next button to continue.
Click here to enlarge

Step Seven
RedSn0w will now prepare the jailbreak data
Click here to enlarge

Step Eight
From this window you can select the jailbreak options you would like. Make sure Cydia is selected and click the Next button to continue.
Click here to enlarge

Step Nine
Please plug your iPad into the computer and make sure its OFF then click the Next button
Click here to enlarge

Step Ten
RedSn0w will now guide you through the steps to get into DFU mode. You can find more help with DFU mode here
Click here to enlarge

Hold down both the Home button and the Power button for 10 seconds.
Click here to enlarge

Release the Power button and continue holding the Home button until RedSn0w detects the device.
Click here to enlarge

Step Eleven
Your iPad will now reboot
Click here to enlarge

Step Twelve
RedSn0w will then begin uploading the new RAM Disk and Kernel.
Click here to enlarge

Step Thirteen
Once this is complete you will be notified that RedSn0w is done. Click the Finish button. When your iPad finishes rebooting (5 minutes or so) it will be jailbroken with Cydia on the SpringBoard.
Click here to enlarge


BOOT TETHERED:
Since this is a tethered jailbreak you must use Redsn0w to help you boot back into your jailbroken device if its powered off for any reason. Simply connect your iPad to the computer, launch RedSn0w, select Just boot tethered right now from the options window and click Next to have RedSn0w boot your device.
Click here to enlarge

*As usual a big thanks to the iPhone Dev-Team and Geohot for their hard work and contribution to the iPhone community.

**Windows 7 users can try running RedSn0w as an administrator in Windows Vista or XP compatibility mode if you experience any difficulties.
Continue reading →

How to Jailbreak Your iPad 1 Using RedSn0w (Windows) [4.3.5]

These are instructions on how to jailbreak your iPad 1 on the 4.3.5 firmware using RedSn0w for Windows. The Mac version of this tutorial is here. If you are on 4.3.3 or lower make sure you do NOT update to iOS 4.3.5. Use the untethered JailbreakMe instead. You can find the appropriate JailbreakMe tutorial here.

Step One
Create a folder on your desktop called Pwnage

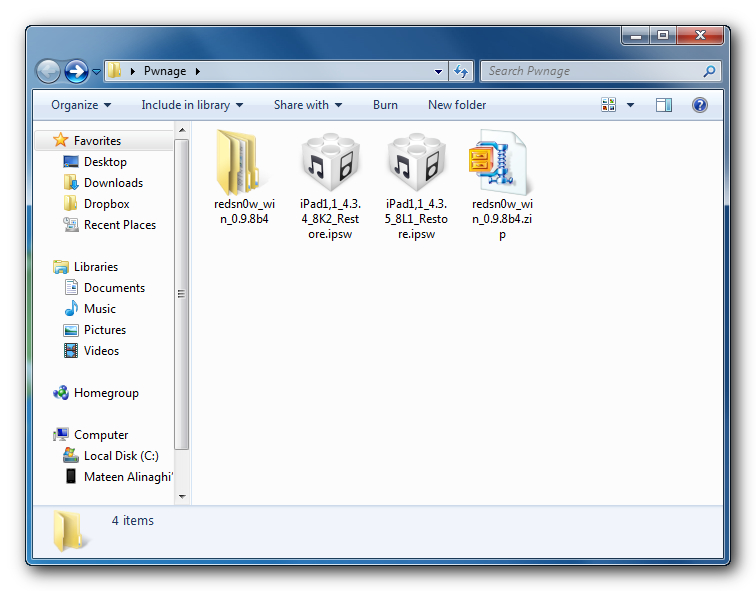
Download RedSn0w from here and place it in the Pwnage folder. Likewise, download the latest 4.3.4 and 4.3.5 firmware from below and place it in the same folder.

4.3.4 (iPad 1): iPad1,1_4.3.4_8K2_Restore.ipsw
4.3.5 (iPad 1): iPad1,1_4.3.5_8L1_Restore.ipsw

Extract the RedSn0w zip file into the same folder.
Click here to enlarge

Step Two
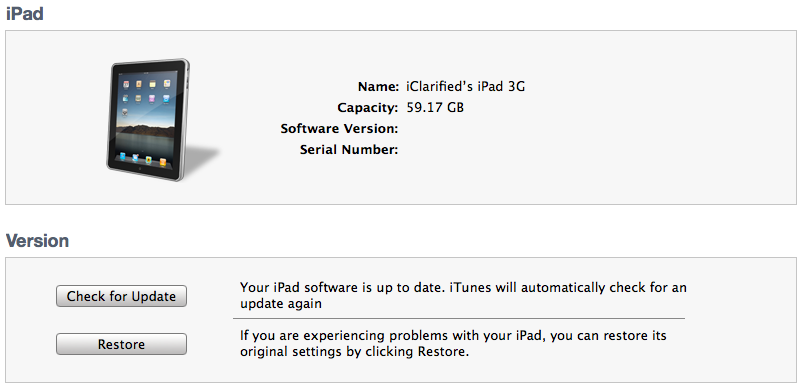
Connect your iPad to the computer and launch iTunes.
Click here to enlarge

Select your iPad from the list of devices on the left. Now hold down Shift and click the Restore button. Restore is preferred as it won't create any wasted space on your iPad.
Click here to enlarge

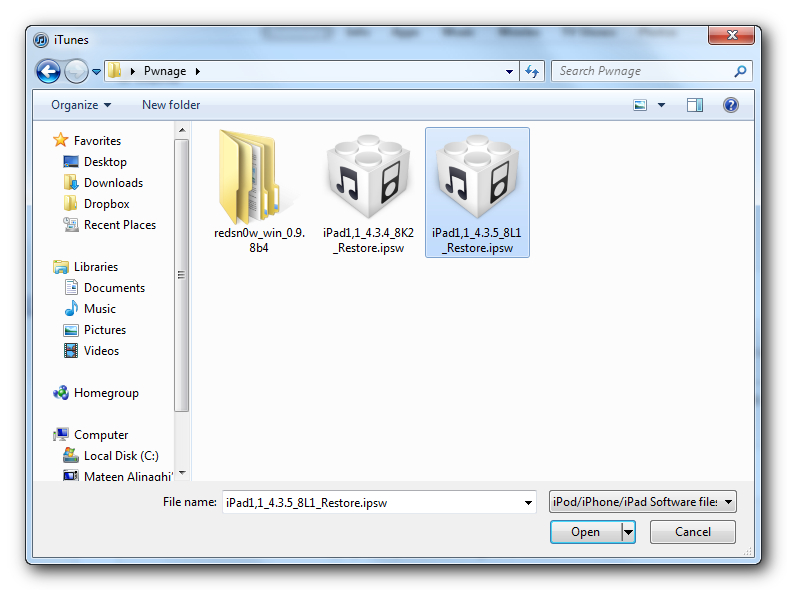
Navigate to the Pwnage folder on your desktop and select the 4.3.5 firmware ipsw. Click the Choose button to continue.
Click here to enlarge

Step Three
Once iTunes has finished updating your iPad to the desired firmware open the Pwnage folder on your desktop and launch the redsn0w application from the redsn0w folder we extracted earlier.

**Windows 7 users may need to run RedSn0w in Vista Compatibility mode. You can do this by right clicking the executable and selecting Properties from the contextual menu.
Click here to enlarge

Step Four
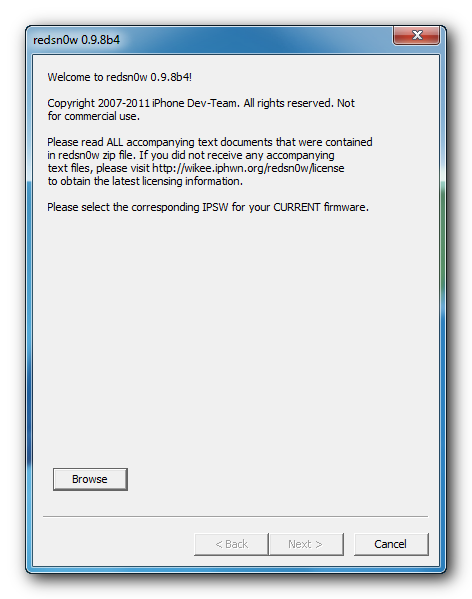
Once RedSn0w opens click the Browse button
Click here to enlarge

Step Five
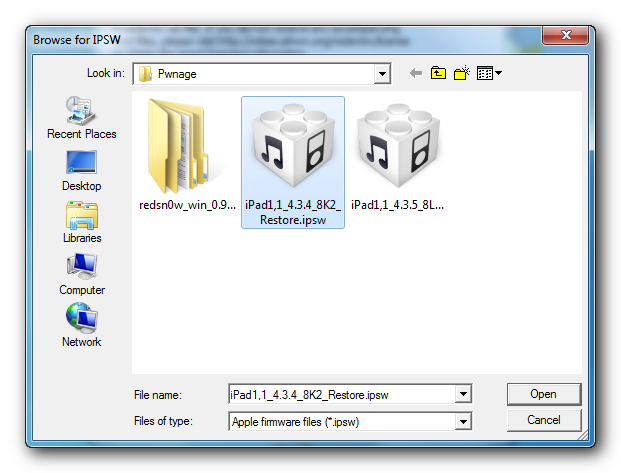
Select the 4.3.5 firmware ipsw we placed in the Pwnage folder on our desktop then click Open.
Click here to enlarge

Step Six
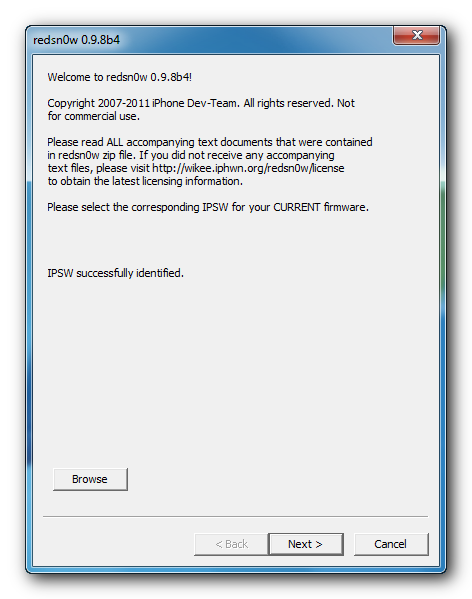
Once the firmware has been verified click the Next button to continue.
Click here to enlarge

Step Seven
RedSn0w will now prepare the jailbreak data
Click here to enlarge

Step Eight
From this window you can select the jailbreak options you would like. Make sure Cydia is selected and click the Next button to continue.
Click here to enlarge

Step Nine
Please plug your iPad into the computer and make sure its OFF then click the Next button
Click here to enlarge

Step Ten
RedSn0w will now guide you through the steps to get into DFU mode. You can find more help with DFU mode here
Click here to enlarge

Hold down both the Home button and the Power button for 10 seconds.
Click here to enlarge

Release the Power button and continue holding the Home button until RedSn0w detects the device.
Click here to enlarge

Step Eleven
Your iPad will now reboot
Click here to enlarge

Step Twelve
RedSn0w will then begin uploading the new RAM Disk and Kernel.
Click here to enlarge

Step Thirteen
Once this is complete you will be notified that RedSn0w is done. Click the Finish button. When your iPad finishes rebooting (5 minutes or so) it will be jailbroken with Cydia on the SpringBoard.
Click here to enlarge


BOOT TETHERED
Since this is a tethered jailbreak you must use Redsn0w to help you boot back into your jailbroken device if its powered off for any reason. Simply connect your iPhone to the computer, launch RedSn0w, select Just boot tethered right now from the options window and click Next to have RedSn0w boot your device.
Click here to enlarge

*As usual a big thanks to the iPhone Dev-Team for their hard work and contribution to the iPhone community.
**Windows 7 users can try running RedSn0w as an administrator in Windows Vista or XP compatibility mode if you experience any difficulties
Continue reading →

Senin, 01 Agustus 2011

Apple TV 2G Update Released With Support For Purchasing TV Episodes

It seems like earlier today, Apple has quietly pushed out an Apple TV 2G update that now brings support for purchasing TV episodes via the Apple TV itself.

John Gruber from Daring Fireball explains:
I just ran software update on my Apple TV 2 and got a new update that adds support for a major new feature: purchased TV shows. You can buy - not just rent but buy - new episodes directly from your Apple TV, and access and stream any TV show episodes you've previously purchased using your iTunes account.
Previously, it was not possible for you to purchase TV episodes via the Apple TV 2G. Not only this, the update also adds support for Vimeo video content and the YouTube playlist feature. Apart from this, Apple has also added Purchased tab under the TV section in iTunes for both Windows and Mac allowing you to free re-download content that you have already paid for.

This brings the Apple TV 2G iOS version up to iOS 4.3 with a build number of 8F455. Initial reports are suggesting that this Purchased feature is currently available in the U.S. as of now. Earlier today, we also reported that Apple may release 3 HDTVs by March 2012.


Continue reading →